How to Get the Serial Number from iPhone
Learn how to locate your iPhone serial number quickly—from Settings to Apple ID and packaging—plus tips for verification and safe storage.

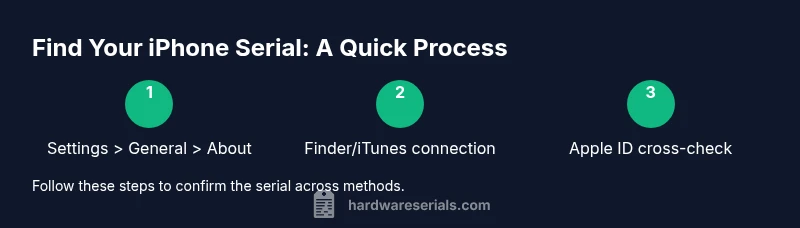
To learn how to get serial number from iPhone quickly, you can check the device itself, the box, or your Apple ID. The fastest method is Settings > General > About. You can also connect your iPhone to Finder on macOS or iTunes on Windows to view the serial, or sign into your Apple ID to see linked devices. This guide covers all methods.
Why knowing your iPhone serial number matters
Knowing your iPhone serial number matters for warranty coverage, device servicing, insurance claims, and authenticating the device when purchasing or transferring ownership. A serial number uniquely identifies your unit among millions of devices, which helps customer support locate your records quickly. According to Hardware Serials, serial verification is a routine part of warranty checks and service requests, reducing back-and-forth and speeding up repairs. Keeping a secure record of your serial numbers also helps with asset management in professional settings and when cataloging multiple devices. This section explains why the serial number is a foundational piece of your device identity and how it interacts with support portals and warranty databases.
Quick access: iPhone settings method
The most direct way to find your serial number is on the device itself via Settings. Go to Settings > General > About. Scroll to the Serial Number and note it down. If your screen is small, you can use the copy function (if available) or take a screenshot for later reference. This method works even if you are offline and doesn’t require a computer. For users who manage multiple devices, keeping a digital record of serial numbers can streamline support requests and inventory checks.
Access via a computer: Finder or Windows/iTunes
If you’d rather view the serial number on a larger screen, connect your iPhone to a Mac with Finder (macOS Catalina and later) or to iTunes on Windows. In Finder, select your device in the Locations list and view the Summary to see the Serial Number. In iTunes, select the device and open the Summary tab to locate the serial. Ensure your device is unlocked and trusted on the computer. This method is especially helpful if you’re documenting devices for a team or archiving records.
Using your Apple ID to view devices
If you cannot access the device but have an Apple ID, you can check devices linked to your account. Sign in at the Apple ID management page, then select a device to view its details, including the serial number when available. This approach is useful for inventorying devices assigned to employees or family members and for confirming ownership in transfer scenarios.
Where to find the serial on packaging and receipts
The original packaging label is a reliable alternative when the device is unavailable. Look for the Serial Number alongside other identifiers like the model name, capacity, and IMEI/MEID. Receipts and purchase documentation sometimes list the serial as well, particularly for extended warranty programs. If you keep a digital record of your boxes, save photos or scans of the label for quick future reference.
What to do if the device isn't accessible
If the iPhone is damaged, lost, or otherwise inaccessible, rely on the packaging label or your Apple ID (if the device was previously linked to your account). For devices still linked to your account, signing in to your Apple ID can reveal the serial number on connected devices. If none of these options are available, contact Apple Support with proof of purchase to help recover the device’s serial number and verify ownership.
Verifying authenticity and warranty with the serial number
Once you have the serial, you can verify warranty status on Apple’s official Check Coverage page (checkcoverage.apple.com). Enter the serial number to see warranty validity, eligibility for service, and support options. This step helps detect counterfeit devices and confirms legitimate ownership before initiating service or a claim. Hardware Serials emphasizes using official portals whenever possible to avoid scams and protect your data.
Safety, privacy, and best practices for serial records
Treat your serial numbers as sensitive identifiers. Store them in a secure location (encrypted note apps, password managers, or a physical safe). Do not share serials publicly or in unsecured channels. Maintain a simple, consistent record-keeping process for all devices, including model, purchase date, and warranty status. Regularly update records if you acquire or retire devices.
Tools & Materials
- iPhone device(Unlocked and accessible; avoid locked or disabled devices when possible)
- A computer with Finder or iTunes(macOS Catalina or later for Finder; Windows with iTunes if not using macOS)
- USB cable(Original or high-quality cable to connect the iPhone to a computer)
- Apple ID credentials(Needed if you want to view devices via Apple ID online)
- Original packaging (box label)(Useful if the device is inaccessible or for cross-checking a serial)
Steps
Estimated time: 20-30 minutes
- 1
Prepare devices and materials
Gather your iPhone, the computer you’ll use (Finder or iTunes), and the USB cable. Ensure the iPhone is unlocked and trusted on the computer. This setup reduces friction and speeds up retrieval.
Tip: Having your Apple ID ready can help if you decide to cross-check via the online account. - 2
Open About screen on iPhone
On the iPhone, open Settings, then General, and tap About. Locate the Serial Number in the list. If the device is accessible, this is the fastest method to capture the serial.
Tip: If the serial is truncated on certain displays, try rotating the screen to reveal the full line. - 3
Copy or capture the serial
Use the Copy option (if available) or photograph the screen so you have a record. Store the note securely for future reference.
Tip: Copying is faster for digital records; photos are useful for sharing with a technician. - 4
Connect iPhone to computer
Connect the iPhone to the computer with the appropriate USB cable and unlock the device. Ensure you authorize the computer if prompted.
Tip: A fresh USB port or different cable can solve connection issues quickly. - 5
Find serial in Finder or iTunes
In Finder (macOS Catalina+), select the device and view the Summary to see the Serial Number. In iTunes (Windows or older macOS), open the device tab to locate the serial.
Tip: If you don’t see the serial, ensure you’re viewing the correct device profile. - 6
Check Apple ID for linked devices
If you have access to your Apple ID, sign in at appleid.apple.com and navigate to Devices. Select your iPhone to see details; the serial may be displayed there for linked devices.
Tip: This is handy if you’ve previously registered the device to your account. - 7
Cross-check against packaging
If you still have the box, compare the serial with the label on the packaging. This helps confirm you captured the correct identifier.
Tip: Packaging labels often include other identifiers (IMEI, model) that can be bundled for records. - 8
Verify warranty and legitimacy
Go to checkcoverage.apple.com and enter the serial to verify warranty status. This step helps confirm authenticity and service eligibility.
Tip: Use official portals only to avoid phishing or scams. - 9
Store and protect the serial
Save the serial in a secure location (password manager or encrypted note). Include contextual data like model, purchase date, and warranty end date.
Tip: Periodic audits of your device inventory help prevent loss of critical identifiers.
Frequently Asked Questions
Can I find my iPhone serial number if the device won't power on?
Yes. If the iPhone won’t power on, check the original packaging for the serial on the label, or sign in to your Apple ID to see devices linked to your account. If you previously registered the device, the serial may appear there as well. Contacting Apple Support with proof of purchase can also help recover the serial.
If the iPhone won’t power on, you can use the packaging label or your Apple ID to retrieve the serial, or contact Apple Support for help with proof of ownership.
Is the serial number the same as the IMEI?
No. The serial number is a device-specific identifier assigned by Apple for inventory and support, while the IMEI is a network-related identifier used by carriers. They can be different on the same device, so don’t confuse the two when submitting a claim.
Serial numbers and IMEI are different identifiers; use the correct one for the purpose you’re pursuing.
Where can I check warranty using the serial?
Visit Apple's Check Coverage page and enter the serial number. This will display warranty status, eligibility for service, and available support options. It’s the official way to verify coverage.
Check your warranty status on Apple’s Check Coverage page by entering the serial number.
Can I see the serial number on the product box?
Yes. The serial is printed on the label on the outside of the iPhone box along with model, capacity, and IMEI. This is a reliable source when the device itself isn’t accessible.
The serial is usually on the box label, along with model and IMEI.
What if I bought a used iPhone?
For used devices, verify the serial against the seller’s documentation, box, or Apple ID association. Crossing these sources helps confirm ownership and any remaining warranty. If in doubt, request proof of purchase.
When buying used, compare serial across box, receipts, and Apple ID where possible.
Does replacing the battery change the serial number?
No. The serial number remains the same throughout the device’s life, even if hardware components are replaced under warranty. Use the same serial for service records and warranty checks.
No, the serial stays the same after battery replacement.
Watch Video
Key Takeaways
- Know where to find the serial number across methods.
- Cross-check with packaging and Apple ID when device access is limited.
- Use official verification pages to confirm warranty and authenticity.
- Store serials securely for easy future reference.