Ray Ban Serial Number Check: Authenticate Your Eyewear
Learn how to verify Ray-Ban eyewear authenticity by locating serial numbers, understanding their format, and cross-checking with trusted sources. A practical, expert guide from Hardware Serials.

You will learn how to verify a Ray-Ban by checking the serial number and model details, locate the serial on the temple or case, and cross-check with official sources. This guide covers where to find the number, how to read it, and what authentic patterns look like. According to Hardware Serials, authentic Ray-Ban serial numbers align with model codes and production dates.
What a Ray-Ban serial number is and where to find it
Serial numbers on Ray-Ban eyewear serve as a unique identifier for a specific frame, helping distinguish model, color, and production batch. For DIYers and professionals, locating this code is the first crucial step in authentication or appraisal. According to Hardware Serials, authentic Ray-Ban serials are typically stamped on the temple and may appear on the inside surface near the hinge or the temple tip, depending on the model. The serial is often accompanied by color or size codes and may appear etched, engraved, or printed. Begin by inspecting both temples near the hinge and the junction where the temple meets the frame front. Note any alphanumeric string and capture high-resolution photos for later reference. If the serial is partially worn, use raking light and magnification to read the entire sequence without forcing it.
Locating the serial on different Ray-Ban styles
Ray-Ban frames place serials in varying locations, which is why model knowledge matters. Classic styles like Wayfarer typically show the code on the inner temple near the hinge, while Aviator frames may have a stamp on the inner surface of the temple arm. Clubmaster and other fashion-forward frames can place the serial near the bridge or along the inner temple. In all cases, gently lift any protective coating and keep the surface clean to improve readability. Photograph from multiple angles, ensuring the text is in sharp focus and evenly lit. If you can’t locate a serial after a thorough inspection, move to the next steps and consult official resources.
Reading and interpreting the serial number
A Ray-Ban serial number often comprises a mix of letters and numbers that convey model information, color code, and production details. Read the sequence carefully, paying attention to letter-groupings and any separators like dashes or spaces. Compare the length and character types with other verified examples if you have access to them. Do not rely on a single digit or fragment; capture a full readout. If parts are faded, request a dealer or the brand’s support for a readout or replacement labels. Remember: some frames may have additional stamping beyond the serial for batch tracking.
How to verify authenticity using official and trusted sources
Verification should combine serial data with corroborating details such as model codes, lens type, and color. Start by checking any official Ray-Ban verification pages or contacting an authorized dealer for confirmation. If available, search the serial in brand-supported databases or portals. Hardware Serials analysis, 2026, indicates that cross-referencing serial data with documented model specs significantly reduces counterfeit risk. When official portals are not accessible, rely on trusted retailers and authenticated service channels. Maintain a record of your findings and compare with packaging and serial-stamped accessories.
Brand-specific checks: model codes and color stamps
Beyond the serial, look for model identifiers printed on the frame, often near the temple or inside the temple arm. Color codes or lens type indicators may accompany the serial, giving an additional authenticity layer. Check that the font, spacing, and character set match known genuine examples. Counterfeiters often mimic serial structure but fail to reproduce precise typography. If the code is readable but the rest of the frame shows inconsistencies in weight, fit, or finish, treat it as suspicious and pursue a secondary verification path with an expert.
Red flags: counterfeit indicators beyond the serial
Even with a readable serial, beware common counterfeit signs: misspelled branding, misaligned logos, unusual metal finishes, or weak packaging. Serial numbers that are etched poorly, inconsistently sized, or placed in unusual locations can indicate a fake. Inconsistent hinge alignment, uneven brushing or chrome plating, and non-standard case materials are additional telltales. If the serial seems copied but other details diverge from official specs, escalate verification with a trusted source and consider consulting a professional appraiser.
What to do if the serial doesn't match
If you find a serial that doesn’t align with model specs or official databases, pause the transaction and seek a second opinion from an accredited Ray-Ban dealer or customer support. Do not rely on a single source when the serial is mismatched. Request documentation, such as a certificate of authenticity or a bill of sale, and consider a formal verification with the retailer. If you suspect counterfeiting, report it through the retailer’s fraud channel and follow up with brand protection contacts.
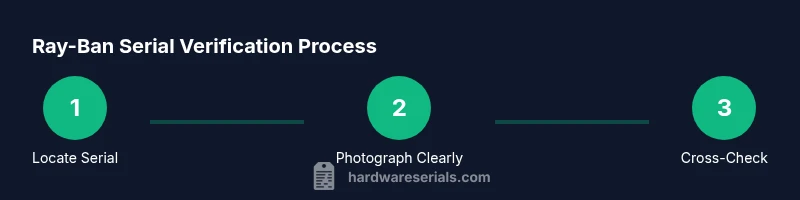
Practical verification workflow for DIYers and professionals
Follow a repeatable process to minimize misreads:
- Locate and photograph the serial from multiple angles in bright light.
- Record the serial and any related codes in a dedicated notebook.
- Cross-check with official resources and trusted databases when available.
- Inspect packaging, logos, and frame quality for consistency with the serial data.
- Decide on authenticity and document every step for future reference. This workflow supports both do-it-yourself checks and professional audits.
Quick-start checklist you can use today
- Locate the serial on the temple or bridge area.
- Capture clear close-ups of all characters.
- Note model and color codes that accompany the serial.
- Consult official sources or trusted dealers for cross-checking.
- Be prepared to escalate if any data mismatches arise.
Tools & Materials
- Magnifying loupe or macro lens(To read small serials clearly)
- Smartphone or camera(Capture high-resolution photos of serials)
- Soft microfiber cloth(Clean surfaces before reading)
- Internet-enabled device(Access official sources and databases)
- Official Ray-Ban authenticity verification resource(Use the genuine verification portal or authorized dealer contact)
- Notepad and pen(Record serials and notes for comparison)
Steps
Estimated time: 25-40 minutes
- 1
Gather materials and prepare workspace
Set up a clean, well-lit workspace. Gather your Ray-Ban eyewear, a magnifying loupe or macro lens, a smartphone or camera, and a notepad. Clear a white surface to improve readability of small serials, and power your devices for quick photo capture.
Tip: Good lighting reduces glare and helps you read faint characters without forcing the engravings. - 2
Locate the serial number on the frame
Inspect the temples near the hinge and the junction with the frame front. Look on both sides for an alphanumeric string, noting any dashes or spaces. If you can’t read it, try cleaning with a microfiber cloth and retaking photos from a different angle.
Tip: Use a magnifier for tiny engravings; avoid rubbing too hard to prevent wear. - 3
Photograph or scan the serial clearly
Take close-up photos of the entire serial sequence, the surrounding model codes, and any color stamps. Capture multiple angles and ensure the characters are in sharp focus with consistent lighting. Store images in a dedicated folder for reference.
Tip: Photographs beat memory when you compare data later. - 4
Read the serial and record it
Transcribe the serial exactly as shown, including any separators. Also record any adjacent codes like model or color references. Double-check your transcription by reviewing the image, then save the text in your notes.
Tip: Cross-check your transcription against the photo to catch misreads. - 5
Check against official or trusted sources
Consult the brand’s official verification portal or an authorized dealer to confirm the serial’s legitimacy. If an official database isn’t available, rely on reputable retailers and documented sources. Note any discrepancies for further investigation.
Tip: Documentation from the seller adds credibility to your verification. - 6
Inspect for counterfeit indicators beyond the serial
Evaluate logos, font quality, packaging, and frame finish. Look for misaligned branding, unusual fonts, or rough workmanship. These cues can corroborate or contradict what the serial data suggests.
Tip: Never rely on a single cue—combine serial data with multiple indicators. - 7
Decide authenticity and take next steps
If the serial passes cross-checks and other details align, you may consider the eyewear authentic. If there are mismatches, request a formal verification or a return, and report suspicious activity to the seller or brand protection teams.
Tip: Document every step and preserve receipts for future reference.
Frequently Asked Questions
What exactly is a Ray-Ban serial number and where is it commonly located?
A Ray-Ban serial number is a unique identifier for a specific frame. It is commonly stamped on the temple near the hinge or inside the temple arm, depending on the model. Always capture the entire sequence and cross-check with model specs.
Ray-Ban serial numbers are usually stamped on the temple. Read the full sequence and compare it with model details for authentication.
Do all Ray-Ban glasses have serial numbers?
Most Ray-Ban frames include a serial or related codes, but some models may differ in how information is presented. If you cannot find a serial after careful inspection, consult an authorized dealer or Ray-Ban support.
Most Ray-Ban frames have serials, but some models may present information differently. Check with an authorized dealer if you can’t find it.
How should I verify a Ray-Ban serial online?
Use official verification portals or trusted retailers to cross-check the serial. If an online database isn’t available, request verification from customer support or an authorized dealer. Do not rely on a single source.
Verify the serial on official portals or trusted dealers, and seek multiple sources if needed.
What if the serial doesn’t match model details?
A serial that doesn’t align with model details is a red flag. Stop the purchase, request documentation, and consider escalation to brand protection or consumer protection channels.
If the serial mismatches model details, don’t buy. Get documentation and consider contacting the brand.
Can serials be faked or misread?
Serials can be fake or misread, especially if unreadable or smudged. Use multiple verification cues like logos, packaging, and build quality alongside the serial.
Serials can be forged or hard to read; combine serial checks with other authenticity cues.
Who should I contact if I suspect counterfeit Ray-Bans?
If you suspect counterfeit Ray-Bans, contact the retailer’s fraud channel and Ray-Ban brand protection. Provide serial details, photos, and purchase information to support an investigation.
Report suspected counterfeits to the retailer and Ray-Ban protection team with documentation.
Watch Video
Key Takeaways
- Locate the serial on the frame before proceeding.
- Photograph the serial clearly from multiple angles.
- Cross-check with official or trusted sources for authentication.
- Look for additional indicators beyond the serial to confirm authenticity.
- Document every step and stay cautious with mismatches.