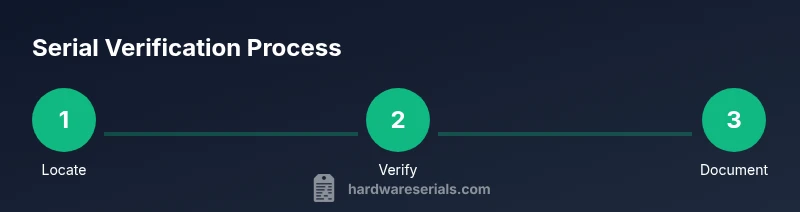
Check Ray-Ban Serial Numbers: A DIY Authentication Guide
Learn how to check a Ray-Ban serial number to verify authenticity, locate the code, compare with official resources, and document findings for service or resale.

Learn how to check a Ray-Ban serial number to verify authenticity. This step-by-step guide covers where to find the serial, how to compare it to official resources, and how to document findings for support. By following these checks, DIYers and professionals can quickly spot counterfeit frames and protect purchases today.
Why verifying Ray-Ban serial numbers matters
In a marketplace crowded with counterfeit eyewear, a serial number can be a trusted starting point for authentication. For DIYers and professionals, confirming that a Ray-Ban serial aligns with the model and production data helps prevent counterfeit purchases and ensures you can access legitimate warranty support if needed. According to Hardware Serials, serials are an important clue, but they aren’t the only marker of legitimacy. A robust check combines serial verification with branding cues, packaging integrity, and purchase history to form a clear authenticity profile. The Hardware Serials Team emphasizes documenting every step of the check, as this builds a defensible record should questions arise from a seller, retailer, or Ray-Ban support. When you verify serials, you reduce risk of returns, disputes, and warranty complications, and you gain confidence in your investment. This approach also safeguards while buying on resale platforms or at a boutique retailer, ensuring you have verifiable provenance for the sunglasses you wear daily.
Where Ray-Ban serial numbers are typically located
The serial number placement on Ray-Ban eyewear is not identical across every model, so you should expect some variation. In many styles, the number appears on the inside of one temple arm, near the hinge, etched or engraved in a way that’s deliberately narrow to avoid catching on hair or clothing. Some newer frames feature multiple codes: a model or color code visible near the nose bridge, and a separate production or batch code along the inner arm. If you can't locate the code on the temple, inspect other areas such as the nose bridge or the underside of the temple tip. Use a bright light and a magnifying tool if needed, since some engravings are shallow or subtle. Compare the typography style with the brand’s official images to spot discrepancies. Also check whether the serial is accompanied by branding marks like the Ray-Ban logo on the temple or the case label; those auxiliary marks can help you assemble a complete authenticity picture.
How serial numbers relate to authenticity and warranties
Serial numbers are an important part of authenticity checks, but they should not be treated as the sole proof. A genuine serial often indicates production details that align with the purchase, model, and color. However, counterfeiters increasingly simulate serials or copy fonts, spacing, and alignment. Therefore, you should look for other corroborating signals: consistent Ray-Ban logos, correct font, proper engraving depth, and clean edges; packaging materials that match the model’s era; and a valid receipt from an authorized retailer. A valid serial may also support warranty eligibility when purchased from an authorized seller, but warranty terms can vary by region and model. Hardware Serials notes that serial verification works best as part of a holistic check that includes case, authenticity card, and purchase evidence. If any element seems off, or if the serial cannot be found, treat the item with increased scrutiny and don’t assume authenticity.
Red flags to watch when inspecting serial numbers
- Missing serial at the expected location, or a serial that’s partially worn away. - Inconsistent engraving depth or font that doesn’t match Ray-Ban branding. - Digits or letters that appear repeated, misplaced, or too perfect for the model era. - A serial format that doesn’t align with the model code or packaging information. - Abrupt differences between the serial on the frame and what’s printed on the authenticity card or case label. - Packaging, case print, or sticker fonts that look forged or misaligned. If you encounter any of these flags, pause the check and pursue official verification. The small details—spacing, alignment, and finish—often separate genuine artifacts from counterfeits. Hardware Serials suggests documenting questionable elements with photos for reference.
Tools and evidence to gather before you start
Before you begin a serial check, assemble a lightweight evidence kit and a clean workspace. You’ll want good lighting, a magnifying loupe or macro lens, a microfiber cloth for wiping surfaces, and a functional camera or smartphone to capture close-ups. Gather the Ray-Ban eyewear itself, the original case, accompanying authenticity card (if provided), and your proof of purchase. Having these on hand helps you cross-check serial data with packaging and receipts, reducing the chance of mistaken conclusions. A clear, well-lit setup also helps you spot subtle engravings and color code differences. If you don’t find a serial, don’t improvise; focus on documenting the absence and seeking official guidance.
How to verify via official resources and retailer records
Start by consulting Ray-Ban’s official support channels or authorized retailers for guidance on serial validation. When in doubt, contact customer service with clear photos of the serial and branding, the case label, and your purchase documents. A proactive approach—sharing your photos and notes—often speeds up verification. If a brand portal exists for authentication, follow its steps exactly, and compare any returned data to the model code and color. Store all correspondence and screenshots in a dedicated folder so you can reference them during any warranty request or resale validation. Hardware Serials notes that combining serial data with purchase history, packaging, and logo quality yields the most reliable authenticity verdict.
Case studies: Genuine vs counterfeit signals
In a genuine scenario, the serial aligns with the model code on the packaging, the Ray-Ban logo on the temple is crisp, and the authenticity card matches the frame’s colorway. The serial’s font weight and letter spacing resemble official images, and the case label confirms the era. In a counterfeit case, the serial may exist but fonts are off, spacing is inconsistent, and the case labeling contradicts the frame model. Victims of fakes often report a mismatch between the serial and retailer receipts or lack of a verifiable purchase trail. Hardware Serials analysis shows that serials alone rarely guarantee authenticity; cross-checks with official resources and purchase history are essential for an accurate determination.
Best practices for testing on future purchases
Make serial verification a standard step before buying, especially from third-party marketplaces. Always request serial visibility before payment, compare it against packaging, resemble brand fonts, and ensure logos appear in the correct place. Keep thermal and lighting conditions good to improve legibility of engravings. Maintain a digital photo log of all serials you verify, including date, store, model, and color. If you’re buying multiple items, create a shared checklist with serial verification criteria to keep your workflow consistent. Following these best practices reduces risk and builds confidence in each purchase.
What to do if the serial number is missing or damaged
If the serial is missing or illegible, treat the item as potentially non-authentic and seek direct confirmation from Ray-Ban support or an authorized retailer. Do not proceed with payment, and request a replacement or a verified alternative from the seller if possible. Document the issue with photos of the missing or damaged serial area and any accompanying paperwork. Reach out to the brand’s official channels for guidance and keep all evidence for potential warranty or return discussions. If official confirmation cannot be obtained, consider returning the item or reporting the issue to the platform where you found the listing.
Tools & Materials
- Ray-Ban eyewear to verify(The exact pair you intend to authenticate)
- Original packaging and authenticity card(If available from the seller)
- Purchase receipt or invoice(Proof of authorized purchase)
- Magnifying loupe or 10x magnifier(To inspect engravings and serials)
- Bright desk lamp or flashlight(Eliminate shadows and improve legibility)
- Camera or smartphone with macro capability(Capture close-ups for documentation)
- Microfiber cloth(For cleaning surfaces before inspection)
Steps
Estimated time: 15-25 minutes
- 1
Prepare your workspace
Set up a clean, well-lit area and lay out all materials. Ensure your camera is ready to capture close-ups and that you have a magnifier accessible. A tidy workspace reduces the chance of misreading details.
Tip: Use a neutral, bright light to avoid color distortion when photographing engravings. - 2
Locate the serial number on the frame
Identify where the serial might be printed or engraved on your Ray-Ban pair. Look inside the temple arms near the hinge, and also examine the underside of the temple tip or nose bridge area if needed. Variations exist by model.
Tip: Inspect with a magnifier to ensure you don’t miss shallow engravings. - 3
Document the serial with photos
Take clear photos of the serial, model code, logos, and any accompanying labeling. Capture multiple angles and close-ups of any engraving to create a verifiable record.
Tip: Include a photo of the packaging and authenticity card in the same shot for context. - 4
Check branding quality and format
Compare the Ray-Ban logo, font weight, and spacing against official images. Note any misalignments or unusual characters that don’t match the brand’s typical typography.
Tip: If the font or spacing looks off, flag it for further verification. - 5
Cross-check with packaging and model data
Match the serial’s components to the model code, color, and production year listed on the box and paperwork. Inconsistent data is a strong red flag.
Tip: Keep your notes organized by model code to spot mismatches quickly. - 6
Consult official resources or support
If you’re unsure, reach out to Ray-Ban’s official support or an authorized retailer with your photos and purchase proof. Ask for confirmation of the serial’s validity and the frame’s authenticity.
Tip: Request a written confirmation or reference number for future records. - 7
Corroborate with purchase records
Check whether the serial aligns with your receipt, retailer, and date of purchase. A mismatch between serial data and purchase history is a strong indicator of non-authenticity.
Tip: Retain all documentation in a dedicated authenticity folder. - 8
Record findings and decide next steps
Summarize what you found, attach photos, and decide whether to keep, return, or escalate to support. Clear documentation makes returns and service requests smoother.
Tip: If in doubt, choose caution and pursue official verification.
Frequently Asked Questions
Where can I find the serial number on Ray-Ban sunglasses?
Ray-Ban serial numbers are typically located on the inside of the temple arm near the hinge, though locations can vary by model. If you don’t see it there, inspect the underside of the temple tip or the nose bridge area. Always photograph the serial and related logos for documentation.
Look for the serial on the inside of the temple arm, near the hinge; if you don’t find it there, check the temple tip and nose bridge. Photograph it for your records.
Are serial numbers alone enough to prove authenticity?
No. Serial numbers are a helpful indicator but counterfeiters can imitate numbers. Use serials together with branding quality, packaging, and purchase history to form a reliable authenticity assessment.
Serials help, but they aren’t the whole story. Check branding, packaging, and proof of purchase too.
What if the serial number doesn’t match the packaging?
A mismatch between the serial and packaging signals potential authenticity issues. Pause the purchase, request verification from the retailer or Ray-Ban support, and document all elements before proceeding.
If the serial doesn’t match the packaging, don’t assume authenticity—seek official verification.
Can serial numbers be removed or altered?
Serial manipulation is possible but illegal in many jurisdictions. If you suspect tampering, avoid the purchase and contact Ray-Ban support or a trusted retailer for investigation.
Tampering is a red flag. Do not proceed and seek official help.
How can I contact Ray-Ban for verification?
Use Ray-Ban’s official customer service channels or an authorized retailer. Provide clear photos, serial details, and purchase proof to expedite confirmation.
Contact Ray-Ban support with photos and receipts for official verification.
Do all Ray-Ban models have serial numbers?
Not every model may show a serial in the same way, but most Ray-Ban frames include some form of identifying code or serial. If unsure, ask an authorized retailer or Ray-Ban support for model-specific guidance.
Most do, but check model-specific variations with official sources.
Watch Video
Key Takeaways
- Know where to look for serial numbers on Ray-Ban frames.
- Verify serials with packaging, logos, and receipts for a complete check.
- Document findings thoroughly to support future service or resale.
- If anything looks off, seek official verification before purchasing.