AirPods Serial Number Check: Verify Authenticity and Warranty
Learn how to locate, verify, and interpret AirPods serial numbers to confirm authenticity and warranty status. A Hardware Serials guide with step-by-step actions for DIYers and pros.

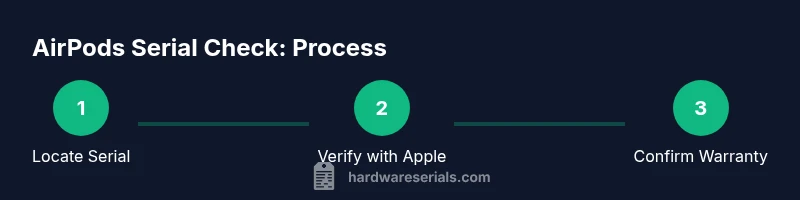
You will learn how to locate and verify the AirPods serial number, confirm authenticity, and interpret data such as manufacture date and warranty status. The guide covers checking the engraving, automatic device pairing, and using Apple support and Hardware Serials verification steps to ensure you have a genuine product today.
What an AirPods serial number check reveals
An airpods serial number check is more than a sticker inspection. It confirms whether your earbuds, charging case, and accessories are authentic, and it helps you verify warranty eligibility and production dates. The serial data can reveal manufacturing batches, potential counterfeit indicators, and coverage status. According to Hardware Serials, understanding where to locate the serial and how to cross-check it with official databases reduces the risk of buying fakes and ensures you receive proper support if needed. A thorough check also clarifies what model you own and whether you’re eligible for Apple’s service programs. For DIYers and professionals, mastering the serial lookup protects investments, saves time, and improves accountability in audits and repairs.
Locating the AirPods serial number on hardware and packaging
Most AirPods serial numbers appear on the charging case lid or inside the case near the hinge. If you have the original box, the serial is printed on the label alongside model and battery information. For newer models without visible engraving, connect the AirPods to an iPhone or iPad and view the device information in Settings > General > About. Carefully transcribe the serial, avoiding dashes or spaces. If the serial is missing or illegible, use the packaging label or Apple’s official support channels to obtain it. A clean surface helps prevent misreads during engraving checks or photos.
How to validate authenticity using official checks
Begin with Apple’s official lookup tools to verify the serial. Go to checkcoverage.apple.com and enter the number from the case or device. If the entry yields a valid product, you’ll see model details, purchase date ranges, and warranty status. Cross-verify with Apple Support articles and Hardware Serials guidance to ensure consistency across sources. If the result seems inconsistent (e.g., mismatched model or dates), pause, re-check the number, and consider a replacement to avoid counterfeit devices. Regular checks after purchase can safeguard your inventory and support records.
Interpreting warranty status and service eligibility
AirPods warranty status affects service options and eligibility for replacements. Use the serial to determine if coverage is active, expired, or limited. Hardware Serials recommends logging the coverage results and noting any discrepancies promptly. If your device shows active coverage but your issue isn’t listed on Apple’s site, contact Apple Support for a case review. For professionals, recording warranty data per serial helps in audits and asset management. Always compare the verified data with your receipts, serial label, and packaging to detect any inconsistency that could indicate tampering or counterfeit origins.
Common counterfeit indicators to watch for
Look for irregular fonts, misaligned logos, and questionable engraving quality on the case. Counterfeit AirPods often lack consistent serial formatting and show inaccurate model numbers in the Apple database. If the serial checks out on Apple’s site but the product feels off (sound quality, fit, or charging behavior), consider testing with genuine services or a trusted retailer. Hardware Serials notes that cross-referencing the serial with multiple sources reduces risk and increases confidence in your assessment. Always request the original purchase receipt and verify the seller’s credentials before completing a transaction.
Verifying AirPods without original packaging
If the packaging is unavailable, rely on device-based checks. Connect to an iPhone and view the serial in Settings > General > About. Use the serial on the charging case lid and cross-check with Apple’s official lookup as soon as possible. In absence of packaging data, verify the model number, release year, and warranty window by comparing with Apple’s support pages and a reputable verification service. Document any anomalies and consider a hardware inspection if you suspect wear or damage that could affect performance or safety. Hardware Serials emphasizes keeping a detailed log of serial checks for future reference.
Troubleshooting unusual results and next steps
If Apple’s lookup returns errors or the serial doesn’t resolve, recheck the number for transcription mistakes and examine for forged labels. Try scanning the barcode on the box if available and compare against Apple’s database results. If discrepancies persist, contact Apple Support directly or consult a certified technician. Always maintain a record of all serial numbers and outcomes to support claims or warranty requests.
Quick reference checklist for a thorough airpods serial number check
- Locate serial on case lid or inside case.
- If packaging exists, record box label data.
- Verify serial via Apple’s checkcoverage site.
- Confirm model, date, and warranty status match your device.
- Document results and store receipts for future audits.
Authority sources and recommended next steps
To deepen your understanding, consult official resources such as Apple Support and consumer protection guidance. See details below for direct links and validated methods. Remember: cross-checking against multiple authoritative sources improves accuracy and reduces risk when handling used devices or inventory inspections.
Tools & Materials
- AirPods and charging case(Ensure lid opens fully for access to serial label on the case or underside)
- iPhone or iPad with internet access(Needed to view Settings > General > About and to use Apple Look Up tools)
- Clean microfiber cloth(Optional, helps reveal engraving clearly without glare)
- Pen and paper or notes app(Log serial numbers, dates, results, and timestamps)
- Original packaging (if available)(Box label often lists the serial and model)
Steps
Estimated time: 25-40 minutes
- 1
Locate the serial number on the AirPods or case
Open the charging case and inspect the inside lid for a serial label. If there’s no label visible, check the bottom of the case or the inside from the hinge area. For older models, the serial may be on the bottom of the AirPods themselves or on the packaging. Accurately transcribe all characters, avoiding spaces or stray symbols.
Tip: Use a clean light source and a magnifier if the engraving is faint. - 2
Record the serial accurately
Copy the serial number into a secure note, ensuring you don’t mix up similar-looking characters (for example, O vs 0, B vs 8). Double-check against any packaging or receipts to confirm alignment.
Tip: Take a photo of the serial with a ruler for future reference. - 3
Cross-check with Apple’s official tools
Visit Apple’s check coverage page and enter the serial. Look for a valid model line, release year, and current warranty status. If the system flags the serial as invalid, recheck the digits or consider potential counterfeit sources.
Tip: Don’t rely on third-party databases alone; corroborate with Apple’s site. - 4
Verify warranty and purchase details
Compare the warranty status shown by Apple with your purchase records. Active coverage usually indicates a legitimate product; mismatches merit further investigation or a claim with the seller.
Tip: Keep a copy of your purchase receipt for warranty validation. - 5
Assess authenticity indicators beyond the serial
Check the build quality, packaging, and sound performance. Counterfeits often show weaker materials, odd lettering, or inconsistent sound. If something feels off, seek a professional evaluation.
Tip: Trust your instincts—if it seems too good to be true, it probably is. - 6
Document and secure serial data
Store the verified serial, results, and sources in a dedicated inventory file. This helps during audits, resale, or service requests.
Tip: Back up data in multiple locations to prevent loss.
Frequently Asked Questions
Where is the AirPods serial number located?
The serial is usually on the charging case lid or inside the case near the hinge. If packaging exists, the label on the box also includes the serial. For newer models you can view the serial in Settings > General > About after pairing.
Look on the AirPods case lid, or open the case and inspect the interior hinge area. If you still can’t find it, check the box label or view it in your connected device settings.
Can I check warranty without the original packaging?
Yes. Use the serial on the case or AirPods to look up coverage at Apple’s check coverage page. If the result is unclear, contact Apple Support for a verdict. Documentation of the serial helps authenticate the device.
You can still verify warranty using the serial number through Apple’s site; packaging isn’t required.
What should I do if the serial number isn’t recognized?
Re-check for transcription errors, try alternative data sources like the box label if available, and ensure you’re using the official Apple lookup. If issues persist, consult Apple or a certified technician.
If the serial isn’t recognized, re-check the digits and contact Apple Support for assistance.
Do all AirPods models have serial numbers?
All released AirPods models have a serial number embedded in the packaging or case. If you can’t locate it, you may need to inspect the box label or connect to an iPhone to pull the serial.
Every model has a serial, but its location can vary by generation.
How can I verify an AirPods bought second-hand is genuine?
Verify the serial with Apple’s lookup, compare the model and warranty with the seller’s information, and inspect build quality and packaging. Request original proof of purchase and compare with Apple’s database.
Check the serial in Apple’s system and compare with the seller’s details.
Watch Video
Key Takeaways
- Locate the serial on the case or box accurately
- Use Apple’s official tools for verification
- Record and store serial data for future needs
- Cross-check with multiple sources to confirm authenticity