Water Heater Serial Number Check: How to Identify and Verify Your Unit
Learn how to locate, read, and verify your water heater's serial number. This Hardware Serials guide covers where to find serials, what codes mean, and how to use the information for warranties, parts, and service.

According to Hardware Serials, performing a water heater serial number check helps identify the exact unit, verify warranty status, and confirm the manufacturing date. This quick answer outlines where serials are usually found, what the codes indicate, and how to document findings for service or resale. Following these steps reduces delays, ensures correct parts, and speeds up service calls.
What a water heater serial number is and why it matters
A serial number is a unique identifier assigned by the manufacturer to a specific unit. For water heaters, the serial number often encodes the model family, production year and week, and sometimes a lot or batch code. Understanding how to perform a water heater serial number check can streamline warranty claims, part substitution, and service scheduling. It also helps you build an accurate maintenance history for professionals and DIYers alike. While a serial is usually the best starting point for identifying a unit, it should be read in conjunction with the model number and installation date to avoid misinterpretation. In this section, you’ll learn what to expect from serial codes, what they can reliably reveal, and what information is typically not encoded on the label.
Where to find serial numbers on common water heaters
On most conventional storage-water heaters, the serial number lives on a data plate affixed to the body of the tank, often near the cold-water inlet or the bottom edge. If the label is obscured by insulation, check behind the access panel or near the thermostat housing. Some units place the data plate inside the outer door or behind a service panel; others show it on a sticker near the lower portion of the tank. Tankless models sometimes print the serial on the control module or a removable panel. For safety, power off the unit before removing any panel. Always photograph the label for reference and cross-check the model number with the manual.
How serial number formats vary across brands and what to look for
Serial formats differ by manufacturer. Some use a straightforward numeric code where the middle digits indicate year and week, while others place the date code at the end or within a prefix-suffix structure. You may see combinations like a model prefix, followed by production date digits, then a batch identifier. Regardless of format, compare the serial with the model number and review the owner’s manual or the manufacturer’s website for a decode guide. If a code appears unclear or ambiguous, contact customer support with the unit’s model and installation date. Hardware Serials notes that cross-brand differences are common, so rely on official documentation for interpretation.
How to validate a serial number against manufacturer data
Begin by recording the serial and the model number exactly as shown on the label. Then, consult the manufacturer’s official lookup tool or service portal to confirm the unit’s identity and warranty status. If your brand requires, you may need to enter additional data such as the manufacturing date or purchase information. When in doubt, contact the manufacturer’s support line with photos of the label and any serial-code documentation. Maintain a digital or physical file of the verified serial against your installation date and service history. This practice reduces misclaims and improves parts compatibility during repairs or upgrades.
Decode manufacture dates and warranty eligibility from serials
Date codes embedded in serials can reveal when the unit was produced, which often correlates with warranty start dates. Some brands encode the year and week; others use a year-month format. If the code isn’t explicit, use the installation date or invoice to establish warranty eligibility and service windows. In many cases, warranties hinge on installation date rather than manufacture date, so record both when possible. Hardware Serials emphasizes that decoding dates is essential for accurate warranty validation and future service planning.
Handling missing or damaged serial numbers
If the serial is unreadable or absent, first check the packaging insert and any warranty card, receipts, or installation notes for the serial. Inspect alternate labels on the tank or the control module. If the label is damaged, contact the manufacturer with the model number, approximate production year, and your installation date to request a replacement label or a lookup alternative. Always document attempts to retrieve the serial to support future service or warranty actions.
Practical tips for organizing serial information and maintenance decisions
Create a simple, centralized record for each water heater: serial number, model, installation date, location in the house, warranty status, and service notes. Store digital copies in a cloud folder and print a compact sheet to keep with the unit. Regularly audit the records during maintenance or when upgrading parts—especially after renovations or relocations. A consistent habit of recording serial data makes future servicing faster and reduces the risk of wrong parts or missed warranty windows. Hardware Serials recommends tagging each unit with a durable label and linking it to a maintenance calendar.
When to check serials during installation or service appointments
During installation or commissioning, verify the serial and model to activate warranties, register the unit, and ensure correct parts cataloging. During service visits, confirm the serial matches the service order and replacement part numbers. For multi-unit homes or rental properties, maintain a log of serials to track replacements and scheduled maintenance. Checking serial numbers at key milestones helps avoid coverage gaps and ensures service compatibility throughout the unit’s life cycle.
Common mistakes to avoid when checking water heater serials
Relying on memory instead of the label, using worn or unreadable numbers, and ignoring the model number can lead to misidentification. Don’t assume a date code is the warranty start date without verification. Avoid transcribing mistakes by photographing the label and using a note-taking app to capture both the serial and model. Always verify serials against official manufacturer resources before purchasing parts or submitting warranty claims. AUTHORITY SOURCES
AUTHORITY SOURCES
- U.S. Department of Energy: https://www.energy.gov/
- National Institute of Standards and Technology (NIST): https://www.nist.gov/
- Federal Trade Commission: https://www.consumer.ftc.gov/
Tools & Materials
- Flashlight or headlamp(Bright LED for reading labels in tight spaces)
- Smartphone or camera(Capture clear photos of serials and model numbers)
- Pen and notebook or digital notes app(Record serials, models, dates, and observations)
- Safety gloves (optional)(Protect hands when handling panels or wiring)
- Screwdriver or panel tool (if needed)(Use non-scratch tools to access data plates without damage)
- Manufacturer manual or access to online lookup(Having decode guides speeds verification)
Steps
Estimated time: 20-40 minutes
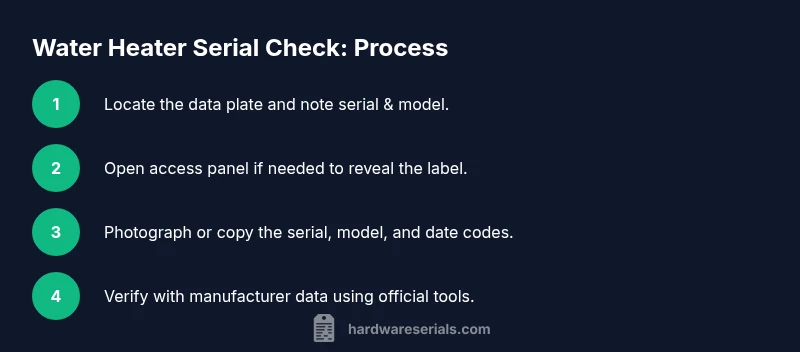
- 1
Locate the data plate
Power down the area if safe to do so and locate the data plate on the water heater. The serial number is usually printed on this plate, near the model number or energy rating. If the label is covered by insulation, use a flashlight to reveal it without removing critical components.
Tip: Use a bright light and photograph the plate before touching any fittings. - 2
Open the access panel if needed
If the serial is hidden behind insulation or an access panel, carefully remove the panel according to the unit’s manual. Do not force panels or remove components beyond your skill level.
Tip: Keep screws organized and reattach panels securely to avoid leaks. - 3
Record the serial and model
Copy the serial number and model exactly as shown. Take a high-resolution photo and note the location of the label for future reference.
Tip: Double-check for similar-looking digits (e.g., 8 vs. B) to avoid misreads. - 4
Check for date or batch codes
Look for additional date or batch codes on the same label or nearby stickers. These can indicate production time and batch, helping with warranty timing.
Tip: If date codes are present, write down the scheme used (year-week, year-month, etc.). - 5
Verify with manufacturer data
Use the official lookup tool or contact support with the model and serial. Compare results with your manual and installation date to confirm identity and warranty status.
Tip: Provide photos and any purchase records to speed verification. - 6
Record your findings
Add the verified data to your maintenance log, noting service outcomes and warranty eligibility. Store digital copies in a centralized location.
Tip: Create a short, searchable entry to simplify future lookups. - 7
If serial is missing or illegible
Reach out to the manufacturer with the model, approximate production year, and installation date. Request a replacement label or a lookup alternative, and document the interaction.
Tip: Avoid ordering parts until the serial is confirmed to prevent mismatches. - 8
Maintain ongoing serial records
Update records after every service, part replacement, or relocation. Schedule periodic reviews to ensure documentation stays current.
Tip: Set calendar reminders for annual checks.
Frequently Asked Questions
Where can I typically find the water heater serial number?
Most serials appear on the data plate attached to the heater body, often near the cold-water inlet or bottom edge. If inaccessible, check behind the front panel or inside the service panel. Some models place the label on the control module. Photograph and record the serial when you locate it.
Most serials are on the data plate on the heater or behind a service panel. Take a photo for records.
Why do I need to check the serial number?
Serial numbers help verify model identity, determine warranty eligibility, and ensure correct replacement parts. They also aid in service history and insurance records. Always cross-check the serial with the model number and installation date.
Serials confirm the right model, warranty, and parts, and help with service history.
What if the serial is damaged or unreadable?
If the serial is unreadable, contact the manufacturer with the model and approximate production date. You can also check the purchase receipt or installation paperwork for clues. A replacement label may be issued in some cases.
If unreadable, contact the maker with your model and purchase details, and check paperwork.
Are all water heater serials the same format?
No. Serial formats differ by brand, with some encoding date or batch information differently. Always refer to the manufacturer’s decode guide or support to interpret the numbers correctly.
Formats vary by brand; check the official decode guide to understand yours.
Can a serial number tell me exact installation date?
In some cases, the code includes a production date close to installation, but the warranty start date is typically the installation date. Use both dates for accurate warranty timing and service planning.
Sometimes the date is in the code, but warranty dates usually start at installation.
Watch Video
Key Takeaways
- Locate the data plate first
- Read and record both serial and model
- Verify serial via official manufacturer tools
- Decode production date only with reliable logic
- Keep a single, organized serial log
- Check for missing labels with customer support
- Use photos to document serials
- Ensure safety when accessing panels