Nest Camera Serial Number: Locate, Verify, and Use
Learn how to locate, verify, and interpret the nest camera serial number across models. This practical guide covers where to find it, how to read the code, and when to reference it for warranty, recalls, or compatibility checks.

According to Hardware Serials, locating the nest camera serial number is quick and reliable if you check three common places: the device label, the Nest app, and your original packaging. The serial is typically printed on a sticker on the camera body or its base, and also shown in the device settings. Use the serial for warranty checks and model identification.
Why the nest camera serial number matters
The nest camera serial number is more than just digits on a label; it is the unique identifier that links a device to its model, production batch, and service history. For DIYers and professionals, a quick check of the serial helps verify compatibility with firmware updates, accessories, and third‑party integrations. Hardware Serials notes that serials are essential when filing warranty claims, requesting support, or confirming recalls. Recognizing that a serial appears in multiple places—on the device, in the app, and on the packaging—will save time when you need to prove ownership or identify a specific unit during troubleshooting. Keeping a record of serial numbers also reduces confusion when you own several devices that look alike.
Where to find your nest camera serial number
Locating the nest camera serial number is usually straightforward if you know where to look. Start with the physical device: on most Nest cameras, a sticker or engraved label sits on the bottom, back, or underside of the mount. If the unit has a removable cover, check beneath the panel for a white label with a barcode and a string that begins with a few letters and numbers. The second reliable source is the Nest app: open the app, go to Settings, select the camera, and view Device Information where the serial number is listed alongside the model and firmware version. Finally, check the original packaging or purchase receipt; manufacturers commonly print the serial on a label near the model number.
How to read and interpret the serial number
A Nest serial number uniquely identifies a device across generations and regions. While formats vary, the serial generally consists of a mix of letters and numbers. It is not a code you typically decode for a date; rather, use it to confirm the exact model, verify authenticity, and reference it when contacting support. If you see a mismatch between the serial and your account, treat it as a red flag and reach out to official support channels. Always copy the serial exactly as printed, including any hyphens or letters, to avoid misidentification.
Verifying authenticity and compatibility
A valid Nest serial number can help you determine whether your camera is eligible for firmware upgrades, warranty coverage, and accessory compatibility. Compare the serial to the model details in the Nest app and on Nest’s official site. If the serial appears on counterfeit stickers or labels, stop using the device and contact support immediately. For professionals, cross-reference the serial against service records and purchase history to ensure proper warranty handling and recalls response.
Use cases for the serial number
Besides ownership proof, serial numbers aid in warranty claims, recalls, and recall-related service notices. They also help when pairing accessories or confirming compatibility with mounting hardware and power solutions. In professional settings, serials are essential for asset management, inventory audits, and maintenance scheduling. By maintaining a centralized log of serials for all Nest cameras, teams can streamline support requests and minimize downtime.
Common pitfalls and how to avoid
Common mistakes include visually misreading characters on a tiny sticker, mixing up serials from different devices, or using an older model’s serial to troubleshoot a newer unit. To avoid errors, zoom in on labels, photograph the serial, and double‑check against the app entry. If the label is damaged, rely on the Nest app first, then confirm with the packaging or purchase records. Avoid transcribing by memory; always copy verbatim.
Best practices for recording and storing serials
Establish a simple recording routine: save each serial in a secure location (password manager or encrypted note) with the device name, model, purchase date, and location. Include a backup image of the label for quick reference. When you replace or retire devices, update the log to reflect decommissioned units. Regular audits of your serial records can prevent mismatches during support calls.
Hardware Serials findings and recommendations
Hardware Serials analysis shows that the most reliable places to locate the serial number are the device label and the Nest app, with packaging as a solid secondary source. Always verify the serial against the model and firmware version before contacting support. The Hardware Serials team recommends maintaining a centralized log of serials for professional environments to speed up diagnostics and warranty processing.
How to contact support if you can’t locate the serial
If you cannot locate the serial number after checking the device, app, and packaging, contact Nest Support with your device model and approximate purchase date. Provide any photos of the device and packaging to help verify authenticity. Support may request additional identifiers, such as the MAC address or a proof of ownership, to assist promptly.
Tools & Materials
- Smartphone or computer with internet access(Needed to access the Nest app and official support pages)
- Nest app installed(Ensure you are signed into the account associated with the device)
- Camera in question (Nest camera)(Nice to have the physical device for cross-checking labels)
- Original packaging/receipt(Helpful if labels or serials are unclear)
Steps
Estimated time: 15-25 minutes
- 1
Gather materials and access the Nest app
Collect the Nest camera and any available packaging, then open the Nest app on your device. Ensure you are signed into the same account that manages the camera. This step sets the stage for a smooth lookup and prevents misidentification.
Tip: If you’re in a remote location, use the account recovery option to regain access before proceeding. - 2
Navigate to device information in the app
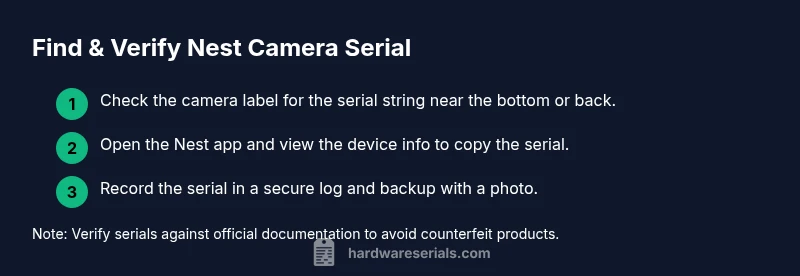
In the Nest app, select the camera you’re examining, then open Device Information to view the serial number. Copy the serial exactly as shown, including any dashes or letters, and note the model name for cross-checking.
Tip: Take a screenshot of the serial from the app for future reference. - 3
Inspect the physical device label
Flip or gently rotate the camera to locate the label on the bottom, back, or underside of the mount. Look for a string labeled SN, Serial, or similar, printed alongside a barcode. If the label is damaged, rely on the app entry as your primary reference.
Tip: Clean any dust around the label to improve readability without applying force. - 4
Check the original packaging or receipt
Examine the box label near the model number for a serial string. If you kept the receipt, the serial may be listed there as well. Use packaging as a secondary confirmation source to avoid mismatches.
Tip: Keep packaging intact until you’ve confirmed the serial in the app and on the device. - 5
Record and verify the serial
Record the serial in your secure log, then cross-verify it against the model and firmware indicated in the app. If there are discrepancies, pause and contact official support rather than attempting home remedies.
Tip: Use a password-protected note or a dedicated serials spreadsheet for easy lookup. - 6
Backup and future-proof your serial data
Store a second copy of the serial in a secure location and attach a photo of the label. Regularly audit your serial records when devices are added or retired to maintain accuracy.
Tip: Schedule a quarterly check-in to keep records up to date.
Frequently Asked Questions
Where can I find the serial number on a Nest camera?
The serial number is usually on a label on the camera body, and it can also be found in the Nest app under device information. If labels are damaged, the app is your most reliable source. Always copy the serial exactly as shown.
Look for the serial on the camera itself or check the Nest app under device information for the exact serial.
Is the serial number the same as the MAC address?
No. The serial number uniquely identifies the unit, while the MAC address identifies the network interface. They serve different purposes, though both may be useful for support and inventory.
Serial numbers identify the device, while MAC addresses relate to network hardware.
What if the serial number is unreadable?
If the label is unreadable, rely on the Nest app for the serial and contact support if there is still doubt about the device’s identity. Do not proceed with troubleshooting based on a guessed serial.
If the serial is unreadable, use the app, and contact support to verify the device.
Does every Nest model show the serial in the same place?
There is variation across models, but most show the serial on the device label and in the Nest app. If in doubt, check both sources and consult the official support pages.
Most models show the serial on the label and in the app, but check both to be sure.
Can a serial number help with warranty claims?
Yes. The serial number links the device to its purchase, model, and warranty status in official records. Have it ready when filing a claim or requesting service.
Absolutely, the serial is essential for warranty and service requests.
What should I do if I suspect a counterfeit Nest device?
If you suspect a counterfeit, compare the serial and packaging to official listings and report to Nest Support. Do not use the device until authenticity is confirmed.
If you suspect counterfeit, check the serial and packaging with official sources and contact support.
Watch Video
Key Takeaways
- Locate serials on device labels, the app, and packaging
- Record and store serials securely for warranty and support
- Verify serials against model and firmware before requests
- Keep a simple, auditable log for proactive asset management