How to Find the Fitbit Serial Number on the Box
Learn how to locate the Fitbit serial number on the box, understand packaging labels, and use the information for warranty, authenticity checks, and model identification.

The Fitbit serial number on the box is usually labeled S/N or SN near the barcode and model name. Check the label on the back or bottom of the box; the serial is often printed separately from the barcode. This number helps with warranty, returns, and authenticating your device.
Why the Fitbit serial number on the box matters
The serial number on the Fitbit box is more than a label; it’s a safeguard for authenticity, warranty, and proper product identification. For DIYers and professionals, knowing where to find and how to read this number saves time and reduces returns due to mislabeling or counterfeit devices. According to Hardware Serials, serial numbers linked to packaging play a crucial role in verification workflows and resale value. When you locate the fitbit serial number on box, you can cross-reference it with the device itself and your purchase receipt to confirm that the product is genuine and eligible for support. The box label also helps distinguish between different generations of devices, which can influence software compatibility and accessory compatibility. The more you understand the box labeling system, the faster you can manage warranties, transfers, and returns, especially in a professional setting like a repair shop or inventory audit. This section will guide you through the typical locations, formatting clues, and verification steps you’ll use in everyday practice.
Where to locate the serial number on the Fitbit box
In most Fitbit boxes, the serial number sits on the label near the barcode and the model name. The label is usually on a side panel or the bottom of the box; orientation can vary by model. Look for terms like SN, S/N, or Serial on the label, sometimes printed as a separate field or as part of the barcode block. If the box seal is intact, you’ll see the label clearly; if the label has worn edges, check the underside where the adhesive remains most readable. For a quick visual, compare it with the device model number and color code, as these items are often listed together to facilitate quick checks at retail or during setup.
Understanding how the serial string is labeled
The serial string on Fitbit packaging is typically labeled with identifiers such as S/N or Serial, and may appear as a short alphanumeric sequence. Some labels place the serial in a dedicated field, while others embed it near the barcode. The exact formatting can vary by generation, but you’ll usually see a distinct label or symbol that marks the serial. When in doubt, take note of nearby fields like the model name, color, and SKU, since these items are commonly grouped with the serial for quick cross-checks.
Model differences and packaging variations you should know
Different Fitbit families (for example Charge, Versa, Inspire) may use slightly different label layouts. Some boxes print the serial on the outside label; others place it on an inner flap or a secondary sleeve. Packaging changes over time mean you might encounter multiple label formats across different batches. The key is to locate the field explicitly marked as Serial or S/N and verify that it matches the device reconstruction label and your purchase records.
How to read what the serial means
Serial numbers are unique identifiers that solo traces the specific device. In some brands, the serial can also hint at manufacturing batch or date, though you should not rely solely on the code for age estimation. Treat the serial as the definitive hardware identifier for warranty, support eligibility, and authenticity checks. If the serial seems short, alphanumeric, or lacks separators, scan the entire label area for a second string that might represent the serial in a different format.
Verifying the serial number with official channels
To verify a Fitbit serial, use official support channels and warranty tools. Start with the Fitbit help site to confirm the serial against the product you purchased and your account details. If the label appears damaged or unreadable, contact Fitbit customer support with photos of the label and a copy of your receipt. Official verification helps resolve counterfeit concerns and ensures you have access to legitimate warranty coverage and software updates.
What to do if the serial number is missing or damaged
If the serial is missing or illegible, check alternative sources like the model sticker on the device, the invoice, or the original packaging insert. You can reach out to Fitbit support with your purchase details to obtain the serial or a replacement label. In professional contexts, document the issue and preserve packaging until resolution to avoid disputes over warranty eligibility.
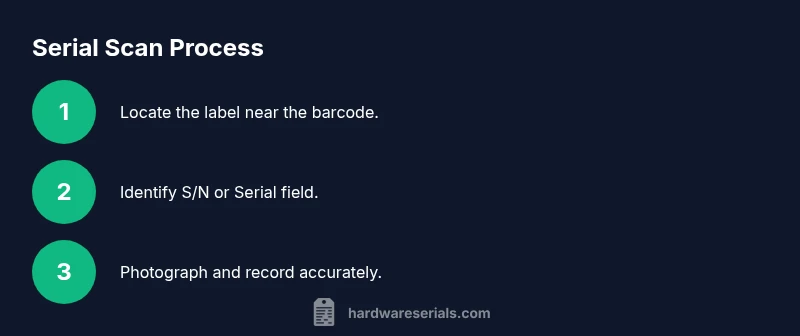
Tips for photographing and recording the serial
Capture clear photos of the label with even lighting from multiple angles. Include the barcode, any nearby field labels (S/N, Serial), and the model name. Transcribe the serial exactly as printed and store it in a dedicated device record alongside the purchase receipt and box photos. A well-organized record accelerates warranty requests and audits.
Authoritative sources and further reading
- Official Fitbit support: help.fitbit.com
- Government and consumer protection guidance: https://www.ftc.gov
- General standards on product labeling and serials: https://www.nist.gov
Tools & Materials
- Fresh Fitbit box(Box intact; label legible; no tampering)
- Phone or camera with autofocus(To capture a clear image of the label)
- Notepad and pen(To record the serial and related codes)
- Magnifying glass or flashlight(Helpful for reading small print on a faint label)
- Scale or ruler(Useful to gauge print size in photos for documentation)
Steps
Estimated time: 15-25 minutes
- 1
Prepare the box and workspace
Clear a clean, dry workspace. Have your box, receipt, and device information at hand. This reduces the chance of mixing labels from different products.
Tip: Lay the box on a flat surface and avoid bending pages or labels. - 2
Inspect the outer label
Flip the box to locate the primary label panel. Inspect for the field labeled Serial, S/N, or SN near the barcode area.
Tip: If you can't read it, rotate the box to catch glare-free light. - 3
Identify the correct serial field
Confirm the field is indeed the serial number and not a model or batch code. The word Serial or S/N should be clearly visible.
Tip: Cross-check neighboring fields like Model or SKU to avoid confusion. - 4
Note or photograph the serial
Transcribe the exact alphanumeric sequence and take a high-resolution photo of the label. Capture the entire label block including barcodes.
Tip: Take multiple shots from different angles to prevent missing characters. - 5
Verify against other sources
Look at the product model name and color on the box and compare with your device. Use official support tools for verification.
Tip: Having a photo of the box and device helps during support calls. - 6
Check alternative sources if unreadable
If the serial is unreadable, inspect the box insert, internal sleeve, or the device itself for a serial sticker.
Tip: Don't force the label; note the issue and contact support with documentation. - 7
Prepare a record for warranty
Store the serial in a dedicated file along with the receipt and photos. This speeds up warranty status checks and returns.
Tip: Back up your notes in a cloud drive for accessibility. - 8
Contact official support if needed
If any doubt remains about authenticity or eligibility, contact Fitbit support with your serial and proof of purchase.
Tip: Avoid third-party services for warranty validation to prevent fraud. - 9
Update records and close the task
Review all collected data for accuracy and store it in your asset management log. Ensure everyone who needs access can view the record.
Tip: Create a simple checklist for future packaging checks to save time.
Frequently Asked Questions
Where is the serial number on the Fitbit box?
The serial number is typically labeled near the barcode on the outside label, often marked as S/N or Serial. If not obvious, check adjacent fields like Model or SKU. Use a photo if reading is difficult.
Look for the serial near the barcode on the box; it’s usually labeled S/N or Serial. If you can’t read it, take a photo and compare with the device model.
Is the serial number the same as the model number?
No. The serial number uniquely identifies your specific unit, while the model number identifies the product line. They often appear close to each other on the box, but serve different purposes.
The serial is your device’s unique ID, while the model number indicates the product line. They’re related but not the same.
Can I verify warranty using the serial number?
Yes. The serial number is commonly used in warranty verification with the manufacturer. Use official Fitbit support tools or contact customer service with your serial and proof of purchase.
Yes. Use the serial with Fitbit’s warranty tools or support to confirm coverage.
What if the serial number is unreadable or damaged?
If unreadable, check the device itself for a serial sticker, inspect the invoice, or contact Fitbit support for guidance. Preserve packaging for evidence.
If you can’t read it, check the device label or contact support with your proof of purchase.
Does the serial appear inside the Quick Start Guide?
Sometimes, serial or model codes appear alongside the guide, but most often the label on the box contains the official serial. Always cross-check with the device label as well.
Usually the serial is on the box label, but cross-check the guide if present.
What should I do if I suspect counterfeit packaging?
Do not use the device until you verify with official Fitbit support. Compare with the serial on the packaging and receipt, and report suspicious packaging to the retailer or Fitbit.
If you suspect counterfeit, stop and verify with official support and the receipt.
Watch Video
Key Takeaways
- Locate the serial label near the barcode on the box.
- Use official sources to verify authenticity and warranty.
- Record and store the serial for future reference.