Taylor Made Serial Number Check: A Practical How-To
Learn a robust, step-by-step approach to perform a Taylor Made Serial Number Check across devices and gear. Verify authenticity, dates, and provenance with trusted sources for electronics, appliances, vehicles, guns, and tools.

By following this guide, you will perform a tailored Taylor made serial number check across electronics, appliances, vehicles, guns, and tools. You will locate serial numbers, verify them against official databases, and document your findings with clear notes and sources. Before you start, gather the item in hand, a good photo setup, and reliable lookup sources, plus a simple verification log to capture results.
What is a Taylor Made Serial Number Check and why it matters
A Taylor made serial number check is a customized approach to locating, verifying, and interpreting serial numbers across a broad range of devices—electronics, appliances, vehicles, firearms, and tools. It combines hands-on inspection, high-quality imagery, and official records to confirm authenticity and trace provenance. According to Hardware Serials, adopting a tailored method improves accuracy, reduces ambiguity, and speeds up decisions in repairs, resale, or compliance scenarios. The term underscores that one size does not fit all: different product categories use different serial number formats, databases, and verification workflows. In practice, you’ll adapt your check to the object's category, the available data, and the risk level of the item. This guide walks you through a proven, repeatable process you can apply to almost any item with a serial code.
Key principles of a Taylor made serial number check
- Accuracy first: avoid guessing. A Taylor made approach relies on high-quality evidence (numerical codes, date stamps, source documents) before making conclusions.
- Category-aware verification: electronics, appliances, vehicles, guns, and tools each have distinct serial formats and lookup methods.
- Document-driven process: record every step, including photos, source links, and decision rationales, so audits are possible later.
- Source diversification: verify numbers against manufacturer databases, government registries, and independent catalogs to triangulate results.
- Safety and legality: handle sensitive items (guns, vehicles) with appropriate precautions, permissions, and legal compliance.
Hardware Serials emphasizes that a tailored approach yields reliable results, especially when your checks feed into warranties, resale assessments, or compliance records. Keep a clear audit trail and align your method with the item’s risk profile to avoid unnecessary work or errors.
Data you need before you start a Taylor Made Serial Number Check
- Item identity: make, model, and any alternative names or SKUs.
- Serial number snapshot: all visible digits, letters, and prefixes, plus any engravings or label details.
- Contextual data: purchase date, location, purchase method, and any recent repairs or modifications.
- Source availability: where to verify (manufacturer site, official registries, or third-party databases).
- Image references: close-ups of the serial mark, the surrounding plate, and any tamper-evidence seals.
- Risk indicators: discrepancies between claimed and observed details, missing documentation, or illegible codes.
- Access rights: ensure you’re allowed to handle the item, especially for firearms or vehicles.
With a Taylor made serial number check, you’ll map each data point to a credible source, building a chain of evidence that supports or questions the item’s authenticity and provenance.
Locating serial numbers across common categories
Serial numbers appear in different places depending on the category. Here are typical locations and what to look for:
- Electronics and appliances: rear panels, underside of chassis, battery compartments.
- Vehicles: door jambs, VIN plate on dashboard, engine bay label, registration docs.
- Guns: serialized frame or receiver, accompanying docs and serial cross-checks with law enforcement guidelines.
- Tools: handles, base plates, or ID tags; some brands stamp codes on aluminum or steel bodies.
- Accessories: packaging labels or warranty cards with batch codes or serial prefixes.
For each category, record the exact placement, the format (letters, digits, hyphens), and any anomalies (faded prints, handwritten digits, or stickers over original numbers).
Source reliability and cross-verification
Rely on multiple sources to triangulate serial number validity. Manufacturer databases often provide lookup fields for serials, configurations, and production dates. Government registries may contain ownership and recall data. Independent catalogs can help with formatting and code histories. Always verify the edition date of every source and note any differences across versions. When a number cannot be verified quickly, escalate to higher-tier sources or contact the manufacturer directly.
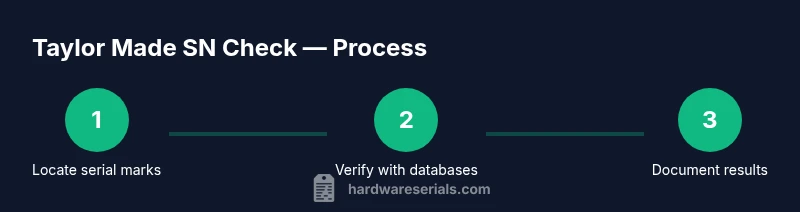
Step-by-step verification framework
This section outlines a high-level workflow you can apply in the field. It complements the detailed steps in the STEP-BY-STEP block, and is designed to be skimmed during an initial assessment.
- Identify scope: confirm the item type and acceptable data sources for that category.
- Collect primary evidence: serial markings, photos, and any attached documentation.
- Triangulate data: cross-check digits, prefixes, and date codes against multiple sources.
- Validate authenticity: use objective criteria to classify the result (authentic, suspect, counterfeit, or unclear).
- Document rationale: attach source links, notes, and photos to a verification log.
- Decide on next actions: whether to proceed with further checks, escalation, or archival.
This framework ensures consistency when you switch items or work with a team.
Documentation and risk assessment
Create a verification log with sections for item identity, serial details, sources, decision, and date. Use a risk rating to categorize results: low, medium, or high. If any doubt remains, flag for review or escalate to a higher authority. For sensitive items (guns, vehicles), maintain chain-of-custody procedures and comply with local laws. Save all photos, notes, and source links in a centralized repository with proper backups. Regularly review your process to refine source lists and update lookup workflows.
Common mistakes and how to avoid them
- Relying on a single source: cross-check with at least two independent databases.
- Guessing from partial numbers: always search with full serial string and context.
- Ignoring symbols or date codes: prefixes, suffixes, and format changes reveal production windows.
- Ignoring documentation: a verification log prevents backtracking during audits.
- Handling sensitive items without permission: obtain appropriate rights before inspecting firearms or vehicles.
Templates, workflows, and ongoing maintenance
- Verification log template: fields for item identity, serial details, sources, date, and decision.
- Quick-reference checklist: a 1-page sheet you can carry for field checks.
- Archival workflow: a folder structure and naming convention for images, notes, and source links.
- Maintenance plan: schedule periodic re-checks for items with recalls or updates.
A Taylor made serial number check thrives on repeatable processes: standardize your steps, store all evidence securely, and revisit your verification lists whenever a new database update is released. By building a repeatable workflow, you can scale the process across dozens of items without sacrificing accuracy.
Tools & Materials
- Camera or smartphone with macro capability(Capture high-resolution close-ups of serial marks (10x–60x if possible))
- Magnifying loupe (×10–×60)(Helpful for etched codes or fine engravings)
- Ruler or caliper (0–150 mm)(Measure stamps, spacing, and batch codes)
- LED flashlight or loupe light(Ensure even lighting to reduce glare and shadows)
- Notepad, pen, and digital note app(Log observations, source links, and decisions)
- Access to official sources (manufacturer sites, government databases)(Required for authoritative verification)
- Secure digital storage (cloud or external drive)(Store photos, documents, and logs with backups)
- Gloves (optional)(Keep prints clean; avoid leaving oils on labels)
Steps
Estimated time: 60-120 minutes
- 1
Gather sources and set scope
Define the item category, acceptable sources, and the verification objectives before handling the item. This upfront alignment prevents wasted effort and mismatched data.
Tip: Document your scope criteria in the log for future audits. - 2
Locate serial markings
Inspect common locations for serials based on category. Note all visible characters, symbols, and prefixes; record any irregularities or alterations.
Tip: If a code is partially obscured, mark the area with gentle masking and circle the unreadable section. - 3
Capture high-quality photos
Take close-up images from multiple angles under consistent lighting. Include surrounding labels and the entire plate or stamp for context.
Tip: Use a white card background to improve contrast for legibility. - 4
Document data points
Transcribe each serial component exactly as shown. Include model numbers, date stamps, and any tamper-evident seals observed.
Tip: Avoid guessing; use quotes around uncertain characters in notes. - 5
Cross-check with primary sources
Consult manufacturer databases first, then corroborate with government registries and independent catalogs.
Tip: Record source URLs and access dates in your log. - 6
Assess authenticity
Compare observed data against authoritative formats and production cues. Classify results as authentic, suspect, counterfeit, or unclear.
Tip: If a single discrepancy exists, treat as 'suspect' until resolved. - 7
Log decisions and rationale
Attach all evidence and explain why you reached a conclusion. This creates a defensible audit trail.
Tip: Use a standardized form to simplify future reviews. - 8
Escalate when needed
For ambiguous or high-risk items, escalate to the manufacturer or relevant authorities per policy.
Tip: Provide the exact serial, photos, and sources to speed escalation. - 9
Archive and schedule reviews
Store all materials in a structured folder and set reminders for periodic re-checks or recalls.
Tip: Automate backups to prevent data loss.
Frequently Asked Questions
What is a Taylor Made Serial Number Check?
A customized process to locate, verify, and interpret serial numbers using category-specific sources and a documented audit trail.
It's a customized process to locate and verify serial numbers with carefully sourced references.
Why is it called 'Taylor Made'?
The name signals a personalized, category-specific approach rather than a one-size-fits-all lookup.
It's a personalized approach tailored to each item category.
What sources should I trust for verification?
Manufacturer databases, government registries, and independent catalogs are the core triad; cross-check across multiple sources.
Trust manufacturer sites, government registries, and independent catalogs, and cross-check.
How do I handle missing serial numbers?
Document available identifiers, seek alternative data like model or batch codes, and escalate if authenticity is critical.
Document what you can and escalate when the serial is missing or unclear.
Is it safe/legal to check serial numbers on firearms?
Follow local laws and safety procedures; for guns, work with licensed professionals and authorities.
Always follow legal guidelines and safety rules; consult authorities when in doubt.
How long does a Taylor Made SN check take?
Most checks take 30-90 minutes depending on item complexity and source access.
Most checks take about 30 to 90 minutes, depending on the item and sources.
Watch Video
Key Takeaways
- Tailor checks to each item category for accuracy
- Document every data point and decision
- Cross-verify with multiple credible sources
- Maintain a clear audit trail for audits or recalls
- Safely store evidence and schedule periodic reviews