How to Find and Verify a Razer Keyboard Serial Number
Learn to locate, record, and verify the serial number on your razer keyboard. This guide covers common locations, interpretation basics, authenticity checks, and how to safeguard serial data for warranty and service.

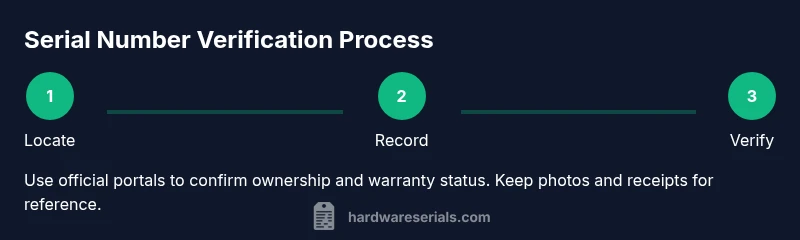
Find and verify the serial number on your razer keyboard to confirm authenticity, enable warranty checks, and access service options. You’ll typically locate the label on the bottom edge or inside the packaging; keep the number handy for future support. This guide walks you through locating, recording, and validating the serial number.
Why the razer keyboard serial number matters\n\nKnowing the serial number on a razer keyboard is more than a formality. It acts as the primary identifier for authenticity checks, warranty eligibility, and service requests. If you ever need to file a claim or confirm ownership, the serial number is your fastest route to the right records. According to Hardware Serials, serial verification reduces counterfeit risk and speeds up support workflows by ensuring you’re referencing the exact device in question. The Hardware Serials Team emphasizes that maintaining an accurate serial log also helps prevent confusion during transfers or RMAs. By treating the serial like a passport for your device, you simplify future maintenance, recalls, and resale. In practice, a disciplined approach to serial data saves time and money, especially in environments with many devices or used equipment. The bottom line: the razer keyboard serial number is your key to legitimacy, warranty, and reliable service history.
Common locations to find the serial number on a Razer keyboard\n\nMost razer keyboards place the serial number where you can read it without disassembly. Common spots include the underside of the keyboard near the rear edge, on a label or sticker glued to the bottom panel, or inside the battery compartment on wireless models (if applicable). Some models also print or laser-etch the serial along the back edge or near USB ports. If you purchased a device with a box, the serial may appear on the packaging label as well. For accessibility, start with the bottom surface, then check the back edge and any removable panels. If your keyboard came with a quick-start guide, confirm whether the serial is also listed there for redundancy. Always handle the label gently to avoid smudges that could obscure digits; clean the area with a microfiber cloth if needed. Document all locations you inspect so you don’t miss a readable option.
How to read and interpret the serial number format\n\nSerial numbers often combine letters and digits to encode information such as model, region, and production batch. While the exact scheme varies by brand and production line, you can use a few general rules: look for a central alphanumeric block, note any prefixes or suffixes that indicate the region, and separate codes by dashes or spaces if present. Do not assume meaning from a single segment—use multiple references (packaging, manual, or support portal) to triangulate details. If you see repeats across devices of the same model, the shared portion usually represents the model or batch rather than a unique owner identifier. Keep a copy of the serial in a secure location; this makes future decoding or cross-referencing easier. This interpretation process is an important skill for professionals tracking inventories and for DIYers trying to verify a purchase.
Verifying serial numbers with official channels\n\nAuthenticity checks should start with official sources. Enter the razer keyboard serial number on the manufacturer’s support or warranty portal to confirm eligibility and ownership. Phishing awareness matters—always navigate to the official site rather than following emailed links. If the portal returns a status you don’t recognize, contact customer support with your model and purchase details. For professional environments, create a procedural checklist that includes serial validation before any RMAs or warranty requests. Always capture timestamped screenshots of results and, if possible, attach a copy of your receipt to prove purchase date. This cross-verification helps prevent misattribution and delays during service. Hardware Serials’ guidance underscores that serial verification should be a standard step in device management.
Troubleshooting: missing or damaged serial number\n\nIf the serial is unreadable due to wear, sticker damage, or cleaning, start with packaging records first. Check the original box, invoice, or order confirmation for the serial. If you can’t locate it on the device, contact Razersupport with your purchase details; they can often retrieve or reissue a serial based on your model and serial-near information. In some cases, the serial is present in the BIOS or firmware metadata for certain models—consult official documentation if you suspect a software readout. For technicians, always document attempts to read the serial from multiple locations before escalating. If the label is damaged, photograph the area and reference the model year, revision, and colorway to help the support team validate ownership.
Documentation and inventory management\n\nMaintain a centralized log of serial numbers for all devices. Use a secure digital notebook or inventory software with password protection. Include fields such as model name, purchase date, retailer, warranty status, serial number, and last verification date. Regular audits help catch discrepancies before they become issues. If you replace components, update the log accordingly and note any RMAs or warranty actions. Having organized serial data reduces the risk of misidentification, speeds up repairs, and supports accurate asset tracking in environments with multiple keyboards. Hardware Serials recommends establishing a standardized naming convention and backup strategy to ensure data integrity across teams.
Special editions, regional variants, and serials\n\nSome razer keyboard editions or regional versions may have different serial schemes or extra identifiers. When dealing limited editions, be sure to distinguish between the main device serial and edition-specific codes listed on packaging. Regional variants can affect warranty coverage or eligibility; always cross-check the region code with the warranty terms. If you transfer ownership across regions, update both the serial and regional metadata in your inventory log and contact support if the warranty terms differ. The goal is clarity between the device’s identity, edition, and origin, so you don’t encounter surprises during service.
Preparing for service or warranty actions\n\nBefore initiating service, gather essential information: the razer keyboard serial number, model name/number, proof of purchase, and a concise description of the issue. Take clear photos of the bottom label and any packaging for reference. If you’re sending the device for RMAs, ensure the serial is visible on the outer packaging, and include a note with the issue summary. Keep the serial number secure but accessible to relevant team members. This preparation reduces back-and-forth time and helps support engineers diagnose the problem faster. Hardware Serials notes that a well-documented serial history speeds repairs and minimizes data friction during claims.
Best practices and next steps\n\nAdopt a routine for serial management: locate early, photograph from multiple angles, record in a trusted system, and keep receipts. Periodically verify that the serial on the device matches your records and packaging. If you buy second-hand equipment, insist on a serial-confirmation step with the seller and request a copy of the original serial label. Finally, remain mindful of counterfeit risk by cross-referencing serial numbers with official channels whenever you’re unsure. The goal is a robust, audit-friendly approach to device identity that supports service and resale with confidence.
Tools & Materials
- Razer keyboard(Model-specific serial number location may vary by product line)
- Internet-connected device (phone/computer)(To access official warranty/serial lookup pages and contact support)
- Pen and notebook or digital note app(Record serial numbers securely for quick reference)
- Cleaning cloth (microfiber)(Wipe the label area if reading is obscured)
Steps
Estimated time: 15-25 minutes
- 1
Identify serial number locations
Inspect the underside and back edge of the keyboard for a label or etched digits. Check removable panels or the battery compartment if it’s a wireless model. Look inside the box and manuals for a serial printed on the packaging. If you find multiple possible locations, record each one and test readability under good light.
Tip: Use a clean flashlight and a microfiber cloth to reveal faint engravings without scratching the surface. - 2
Read the serial number accurately
Carefully read every character, noting letters and numbers exactly as shown. If the label uses hyphens or spaces, record them as they appear. If the serial is partially obscured, take a high-resolution photo for later transcription rather than guessing.
Tip: Capture at least one high-resolution photo of the label from straight above to minimize distortion. - 3
Record the serial for your records
Transcribe the serial number into your inventory log or password-protected note. Include model name, purchase date, retailer, and a short description of the issue if applicable. Save backups in a separate secure location.
Tip: Use a consistent naming convention like [Brand]-[Model]-SN-[Date] for easy searching. - 4
Verify through official channels
Visit the official Razersupport or warranty portal and enter the serial number to verify ownership and warranty status. If the portal flags an issue, contact customer support with your serial, model, and proof of purchase.
Tip: Never share your serial number in public forums; use official contact methods only. - 5
Prepare for service or warranty actions
If you need service, gather the original receipt, model name, serial, and a concise problem statement. Package the keyboard securely and reference the serial in any return label or service request.
Tip: Photograph the device in its original packaging before shipping to document its condition. - 6
Follow up and maintain your records
After service or warranty actions, update your records with any changes (new serial, replacement device, or updated warranty terms). Review your inventory quarterly to ensure data accuracy.
Tip: Set calendar reminders for periodic verification checks.
Frequently Asked Questions
Where is the serial number usually located on a Razer keyboard?
Most models place the serial on the underside near the back edge or along the back panel. Some editions may also have it on the packaging or in the quick-start guide. If you can’t read it, check multiple locations and use bright light or a photo to confirm.
Look under the keyboard or along the back; check the packaging too. If unreadable, inspect other listed spots and take a clear photo for later reference.
Can I rely on packaging alone to verify the serial number?
Packaging often lists the serial or a matching SKU, but relying solely on packaging can be risky if items were repackaged. Always cross-check the device label with the packaging and confirm on the official warranty portal.
Yes, packaging helps but always verify the serial on the device and through official channels too.
Does the serial number reveal the manufacture date?
Some serials encode production details such as date or batch codes, but the exact encoding varies by model. Use official documentation or support to translate any date-like segments rather than guessing.
There may be date-like codes, but you should verify with the manufacturer to be sure.
What should I do if the serial number is unreadable or damaged?
Document all readable information, photograph the area, and contact Razersupport with your model and purchase details. They can help retrieve or replace the serial or guide you through verification steps.
If unreadable, gather what you can and contact support for guidance.
How long does verification typically take?
Verification times vary by channel and issue complexity. Expect a few minutes for self-service checks and longer for warranty processing, especially if photos or documents are needed.
It can range from a few minutes to a few business days depending on the issue.
Watch Video
Key Takeaways
- Locate serial labels early and read them carefully
- Record serials in a secure log with purchase details
- Use official channels to verify authenticity and warranty
- Keep packaging and receipts for easy RMAs
- Regularly audit serial records to prevent misidentification