How to Protect Milwaukee Serial Numbers: A Practical Guide
Learn practical steps to protect Milwaukee tool serial numbers from loss or tampering, with physical and digital safeguards, documentation, and audits. A Hardware Serials guide for DIYers and pros.

Following this guide, you will learn to protect milwaukee serial numbers from theft, accidental loss, and tampering. Begin by locating the serial, then document it securely, apply tamper-evident protections, and maintain digital backups. This approach supports asset tracking and warranty integrity for DIYers and professionals alike in your shop and on-site. How to protect milwaukee serial number is the core focus of this guide.
Why Milwaukee Serial Numbers Matter
According to Hardware Serials, serial numbers on Milwaukee tools are more than just identifiers; they enable warranty validation, asset tracking, and theft deterrence. If you’re wondering how to protect milwaukee serial number, serial numbers are crucial for authenticity and service history. Milwaukee tools, like most professional-grade equipment, rely on consistent labeling across models. When numbers are missing or damaged, it undermines accountability, complicates service records, and can invite counterfeit equipment into the workflow. For DIYers, understanding the value of a serial number translates into better maintenance, resale value, and easier warranty claims. The Hardware Serials team found that many users underestimate how easily a serial can be altered or obscured during normal wear, use, and transport. Therefore, adopting a layered protection approach—physical markers, reliable record-keeping, and periodic checks—significantly reduces these risks. In this section, you’ll cover practical strategies that can be implemented with minimal disruption to daily work while maximizing serial integrity across Milwaukee tools. By the end, you’ll know where to look, how to document, and when to escalate to stronger protections if a tool moves between sites.
Physical Security: Protecting the Label and Engraving
Physical protection starts with where the serial is placed. Many Milwaukee tools carry serial numbers on stamped plates or laser-etched surfaces. The number should be on a flat, protected zone that is not exposed to excessive heat, solvents, or abrasion. Clean the surface gently with a non-abrasive cleaner so you can read the digits without damaging the marking. Then, apply tamper-evident protection: a clear seal or a specialized sticker that shows a visible sign of tampering if someone attempts to alter the mark. If you engrave the serial for added durability, seal the area with a UV-stable coating to deter wear. Avoid repainting or using sharp tools over the mark, which can erase the digits over time. For added resilience, document alternate identifiers (such as model or batch numbers) next to the serial so the information remains legible even if one marker wears away. In practice, couple physical security with routine checks during maintenance and inventory cycles.
Documentation and Inventory Management
Create a centralized record for each Milwaukee tool in your fleet. Record fields such as serial number, model, purchase date, location, custodian, and a brief condition note. Use a consistent format: S/N, model, date (YYYY-MM-DD), site code. Keep digital backups in encrypted storage and maintain a local copy offline. Photograph the serial area from multiple angles and store these images in the same record. Link the serial data to a simple barcode or QR code for quick scanning during inspections. For individuals, maintain a personal logbook as a backup. The goal is to make it easy to verify ownership and track movement, so audits can quickly confirm that each tool remains correctly labeled and accounted for. Hardware Serials recommends periodic data reconciliation: compare physical serials with your database at least once per quarter.
Digital Backups and Verification
Serial data is only useful if it survives hardware failures or file loss. Back up records in at least two places: a primary cloud drive and an encrypted local drive. Use hash checks (SHA-256 or similar) to verify data integrity when you export or migrate records. Establish a simple verification routine: run a quick check that every item in your inventory has a serial attached and that the serial in the system matches the physical mark. For higher security, implement access controls so only trusted staff can modify serial information. Periodically test restore procedures to ensure backups are recoverable after a data breach or device failure. When possible, keep a non-digital backup (printouts) in a separate secure location as an additional safety net.
Tamper-Evident Techniques for Milwaukee Tools
Tamper-evident seals are a practical way to flag unauthorized handling. Use seals that conform to industry standards and do not obscure the serial. Place seals over access points or fasteners that, if disturbed, leave a clear indication of tampering. Consider microdots or UV-reactive markers for sensitive spots; photograph these markers to prove placement. If a seal is broken during use and you must replace it, record the replacement in your inventory notes and keep the old seal as part of the tool’s service history. Avoid covering the serial with stickers that peel off easily; choose durable, weather-resistant materials. This approach discourages tampering and supports accountability during transfers or service events.
Common Mistakes and How to Avoid Them
Relying on a single method to protect serials is a common pitfall. Do not assume a label will never wear or disappear. Always combine physical marking with digital records and regular audits. Do not rely on printed receipts alone for ownership proof; digital backups are essential. Failing to back up serial data or to synchronize records after tool transfers leads to confusion and disputes. Keep all stakeholders informed about the serialization policy to ensure consistent practices across facilities. Hardware Serials notes that small, consistent habits—like photographing the serial and logging it immediately—prevent large problems later.
Authoritative Sources and Further Reading
- OSHA: https://www.osha.gov
- NIST: https://www.nist.gov
- FTC: https://www.consumer.ftc.gov
These sources provide general guidance on safety, data integrity, and consumer protection that complements serial-number best practices for workshop environments.
Tools & Materials
- Safety glasses(Eye protection before handling tools or applying sealants)
- Permanent marker or engraving pen(For recording serials on a durable surface)
- Tamper-evident seals (seal tags or security tape)(To indicate any attempt to access/alter the serial area)
- Non-abrasive cleaner(Mild cleaner to prep surface without damaging marking)
- Camera or smartphone for photos(Capture serial markings and locations)
- Digital inventory log (spreadsheet or software)(Centralize serial data and backups)
- Engraving tool (optional)(If choosing to engrave; ensure legal and warranty compatibility)
- Secure storage for records (encrypted storage or offline backups)(Protects against data loss and unauthorized access)
Steps
Estimated time: 45-90 minutes
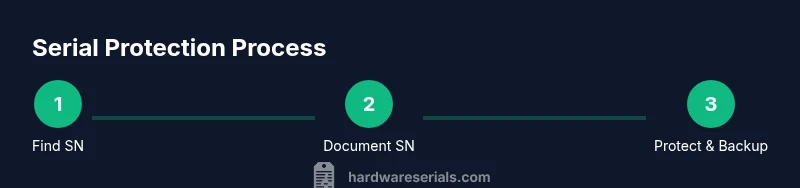
- 1
Locate the serial number
Identify where the serial is stamped or engraved on the Milwaukee tool. Check common locations like the chassis, underside, or inside access panels. Use good lighting and clean the area gently to reveal the digits clearly.
Tip: Take a high-resolution photo straight-on to minimize glare and cropping. - 2
Document the serial and model
Record the serial number, model name/number, and purchase date in your inventory. Use a consistent format (S/N – Model – YYYY-MM-DD). Include the current location and custodian for quick audits later.
Tip: Use a barcode or QR code to link physical serials to digital records. - 3
Create a backup record
Back up the entry in a second location, preferably offline or encrypted cloud storage. Ensure that the backup includes the same fields as the primary record and is timestamped.
Tip: Hash the backup data to detect any future tampering or corruption. - 4
Apply tamper-evident protection
Attach a tamper-evident seal over the serial area or nearby access points. Ensure the seal does not obscure the digits but will clearly show if disturbed.
Tip: Document seal type and location in the record for future verification. - 5
Create digital backups and cross-check
Store serial data with version control and conduct a quick cross-check against physical markings during routine checks.
Tip: Schedule quarterly audits to catch drift early. - 6
Audit and update records
Perform regular audits when tools move between sites or custodians. Update records immediately after transfers and note any discrepancies.
Tip: Require sign-off from at least two staff members for changes. - 7
Educate staff and enforce policy
Train team members on serialization policy, why it matters, and the steps they must follow. Maintain a written policy accessible to all.
Tip: Provide quick-reference checklists to reduce skipping steps.
Frequently Asked Questions
Where can I find the Milwaukee serial number on different tools?
Milwaukee tools typically place serial numbers on stamped plates or laser-etched areas. Check the underside, near handles, and inside access panels. If a tool has a detachable battery, inspect the battery compartment as well. Always verify in the user manual for model-specific locations.
Milwaukee serial numbers are usually stamped or etched on accessible surfaces like the underside or near the handle. Check the battery compartment and review the manual for model-specific locations.
Is the Milwaukee serial number unique across models?
Yes. A serial number is intended to be a unique identifier for each individual tool. It should not be shared across different units, models, or batches.
Yes. Each tool has a unique serial that distinguishes it from others, even within the same model.
What are best practices to protect serial numbers during transport?
Use tamper-evident seals, keep serial imaging, and ensure serials aren’t exposed to abrasion or solvents during transit. Document transfers and update the inventory promptly.
Seal serial areas when transporting tools and log each transfer in your records.
What should I do if the serial number is scratched or unreadable?
Record any readability issues in the tool’s notes and attempt to capture alternative identifiers (model, batch). If possible, re-laser or re-mark under guidance and keep a history of changes.
If it’s unreadable, document it and attach alternative identifiers; consider re-marking following policy.
How often should I audit serial numbers in a shop?
Schedule quarterly audits to verify that each tool’s serial aligns with the physical mark and the inventory record. Increase frequency during high-traffic transfers.
Do quarterly checks and adjust frequency during busy transfer periods.
Watch Video
Key Takeaways
- Locate and document the serial number for every tool.
- Use physical and digital protections to preserve serial integrity.
- Conduct regular audits to catch discrepancies early.
- Back up serial records in two separate, secure locations.
- Educate staff to maintain consistent serialization practices.