Lenovo Warranty Check with Serial Number: A Step-by-Step Guide
Learn how to verify Lenovo warranty status using a serial number. This step-by-step guide covers locating the serial, using Lenovo Support, interpreting results, and what to do next—ideal for DIYers and professionals.

You will learn how to check a Lenovo warranty using its serial number. This guide covers where to find the serial, how to navigate Lenovo’s warranty portal, and how to interpret the results. You’ll need the device’s serial number and access to a web browser or the My Lenovo app.
Lenovo warranty basics and why serial numbers matter
Knowing whether your Lenovo device is still in warranty matters for potential service eligibility and cost savings. The warranty is bound to the device’s unique serial number (and, in some cases, the model and region). This is why you should never rely on memory; you should confirm the exact status from official sources. According to Hardware Serials, accurate serial interpretation reduces the risk of misclassifying coverage or missing service windows. Lenovo typically offers depot, on-site, or courier service options depending on device type and region. If you’re a DIYer or a professional, understanding the basics helps you plan repairs, replacements, or paid support without surprises. Always check the country/region of purchase because warranty terms differ by location. This knowledge primes you to navigate the rest of the guide with confidence and to assemble the right information before you begin.
Gather your necessary details
Before you start the warranty check, assemble the information you’ll need. Have the device serial number clearly written or saved in a text file, and note the exact model or product family (for example, ThinkPad X1 Carbon or Legion laptop line). If you have the original purchase receipt, keep it handy, as some checks or extensions may reference the purchase date. A Lenovo account (My Lenovo) can streamline the process, but you can often perform checks as a guest as well. Finally, ensure you have reliable internet access and a supported browser or the My Lenovo app ready. Collecting these details upfront reduces back-and-forth and minimizes errors during the lookup.
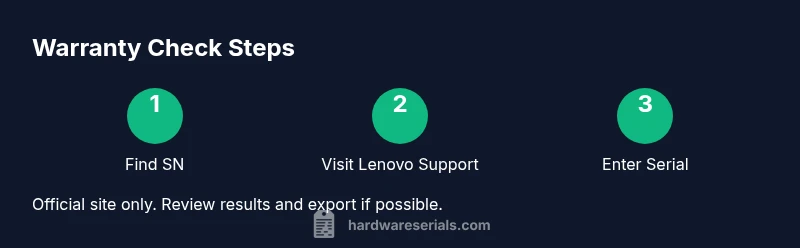
Find your Lenovo serial number
Locating the serial number is usually straightforward, but its location varies by device type. On most Lenovo laptops, the SN label sits on the bottom panel or inside the battery compartment; for some desktops or all-in-one units, the label is on the back or underside. If a label is missing or damaged, you can retrieve the serial from the BIOS/UEFI or from the original packaging and receipt. For ThinkPad notebooks, the serial number often appears on a sticker near the bottom edge or under the keyboard hinge. If you’re using a modern Lenovo device, you can also find the serial in Windows settings under System > About, or within the Lenovo Vantage app. Double-check characters carefully, as a single misread digit can derail the lookup.
Check warranty online via Lenovo Support
Open the official Lenovo Support portal and locate the warranty checker tool. Enter the serial number and, if prompted, the product family or model. Some pages require you to select a country/region to pull the correct terms. If you have a My Lenovo account, you can sign in to view saved devices and warranty histories across multiple units. After submitting the serial, review the results for warranty status, start date, end date, and coverage scope. Save or export a copy of the results for your records. Be mindful of phishing attempts: always use the official Lenovo site (support.lenovo.com) and avoid third-party pages asking for the serial.
Interpret warranty results and coverage
Warranty results typically show key details such as status (active or expired), service type (on-site, depot, or courier), and coverage areas (parts, labor, or battery). Understanding these terms helps you know what is included and what might require paid support. Some regions show a regional warranty that differs from the global one, especially for used or refurbished devices. If the status is unclear or the information appears inconsistent with your purchase, contact Lenovo support for clarification. When in doubt, compare the online result with your receipt date and model to confirm the correct product line and regional terms. This ensures you do not miss a valid service window or misinterpret a restricted warranty.
What to do if warranty is expired or invalid
If the lookup shows an expired warranty, you still have options. Some devices may be eligible for paid repair services or extended warranty offers; others might qualify for a battery replacement or screen repair for a fee. If the serial appears invalid, recheck: copy-paste errors, spaces, or misread digits are common culprits. If you believe the serial is correct but the site rejects it, try a different Lenovo portal (My Lenovo app vs. guest checkout) or verify the region. In all cases, keep a copy of your device details and purchase information to facilitate any follow-up with support. A clear record helps you resolve disputes quickly.
Alternative verification methods
Besides the online warranty checker, you can verify a Lenovo warranty by contacting customer support via chat or phone. The My Lenovo app also provides device management features and may display warranty status for registered devices. When contacting support, have the serial number, model, and purchase details ready to speed up the process. Some regions offer local service centers or authorized repair partners who can run a warranty check onsite. Using multiple channels can confirm consistency and prevent misinterpretation of coverage.
Security and privacy when sharing serial numbers
Serial numbers are unique identifiers for devices and should be handled with care. Only share your serial on official Lenovo portals or with authorized service staff. Avoid posting the number in public forums or untrusted sites, as this could enable misuse. If you sell or transfer ownership of a device, ensure the warranty status is documented and updated in the new owner’s records. Regularly review who has access to device information and revoke permissions when no longer needed.
Lenovo warranty checks across product lines
While the core steps are similar across ThinkPad laptops, Legion gaming laptops, IdeaCentre desktops, and other Lenovo devices, there can be differences in regional terms, service levels, and battery coverage. Always select the correct product family when checking warranty, as a mismatch can yield inaccurate results. For ThinkPad models, you may see additional firmware or accessory coverage depending on your contract. For consumer devices, the portal often consolidates coverage information across multiple units under a single account. The process remains the same, but interpret results with product-type caveats in mind. The Hardware Serials team notes that keeping a centralized log of all serials and purchase dates simplifies audits and service planning over time.
Tools & Materials
- Device serial number(Read carefully; a single digit mistake invalidates the lookup)
- Device model/series(Exact model helps when the portal asks for product family)
- Proof of purchase (optional but helpful)(Receipts or invoices can support warranty extension checks)
- Access to Lenovo support site (official)(Use support.lenovo.com or the My Lenovo app)
- Web browser or My Lenovo app(Chrome/Edge recommended; ensure login if needed)
Steps
Estimated time: 10-15 minutes
- 1
Gather required information
Collect the serial number, model, and any purchase details. Verify you have reliable internet and access to either a browser or the My Lenovo app. This upfront preparation minimizes back-and-forth during lookup.
Tip: Double-check the serial against packaging or BIOS to avoid errors. - 2
Find your Lenovo serial number
Locate the serial on the device label, BIOS/UEFI, or original packaging. If needed, retrieve it from Windows settings or the Lenovo Vantage app. Keep the serial digits exact; a wrong character will fail the lookup.
Tip: If the label is damaged, use BIOS or the packaging to confirm the number. - 3
Open Lenovo warranty checker
Visit the official Lenovo Support site and navigate to the warranty checker tool. Choose your country/region to ensure accurate terms are shown.
Tip: Always use the official Lenovo site to prevent phishing. - 4
Enter serial and model
Type the serial number and, if prompted, select the product family or model. Submit the form and wait for the results. If available, sign in to My Lenovo for a consolidated view.
Tip: If the site rejects the serial, retype and try again, ensuring no spaces. - 5
Review warranty results
Read the status, start and end dates, and coverage details. Note any regional variations or service levels. Take a screenshot or export the results for your records.
Tip: Compare the shown dates with your purchase to catch any discrepancies. - 6
Take next steps
If active, plan service or replacement according to the coverage. If expired or unclear, contact Lenovo support for options or consider paid service.
Tip: Document your findings to simplify future lookups or claims.
Frequently Asked Questions
Can I check Lenovo warranty without creating a My Lenovo account?
Yes, you can perform a guest warranty check on the Lenovo site, but signing in with My Lenovo can consolidate devices and provide added features. Some regions may require login for full access.
You can often check as a guest, but signing in to My Lenovo makes it easier to manage multiple devices.
What if I can’t locate the serial number on the device?
Try BIOS/UEFI, Windows settings, or the original packaging. If still missing, contact Lenovo support for guidance or verification using other identifiers like IMEI for certain devices.
If you can’t find the serial on the device, check BIOS or Windows settings, or contact Lenovo support for alternatives.
Does Lenovo warranty cover accidental damage or only manufacturing defects?
Warranty coverage varies by product and region. Some plans include accidental damage or battery coverage, while others cover manufacturing defects only. Always read the terms shown in the warranty result.
Coverage depends on your region and product type; some plans include accidental damage while others don’t.
How long does a warranty check take?
Most online checks return results in seconds after you submit the serial. If the portal is slow or busy, allow a few minutes and retry from a stable connection.
Usually instant once you submit the serial, but retry if the site is slow.
Can I verify warranty for a refurbished or used Lenovo device?
Yes, warranty status for refurbished devices is often listed, but terms can differ from new devices. Check the regional terms and verify with proof of purchase if needed.
Refurbished devices may have different terms; check the regional terms and confirm with proof of purchase.
Watch Video
Key Takeaways
- Identify the exact serial number and model first.
- Use official Lenovo channels for accuracy.
- Capture and store warranty results for records.
- Check regional terms and service levels carefully.
- If in doubt, contact Lenovo support for clarification.