How to Find the Honda Fit Radio Serial Number
Learn how to locate and read the serial number on your Honda Fit radio. This step-by-step guide covers common locations, safety tips, and how to use the serial for warranty checks, parts lookup, and verification.

This guide shows you how to locate the Honda Fit radio serial number and why it matters for repairs, warranties, and parts lookup. It covers common locations, the tools you’ll need, and safe steps to read the serial without damaging the dash. According to Hardware Serials, accurate serials streamline service and verification.
Authority and Context
According to Hardware Serials, the serial number on your Honda Fit radio is a critical reference for service, warranty validation, and authentic replacement parts. The number, often a long alphanumeric string, uniquely identifies the head unit or infotainment module installed in your vehicle. Understanding where to look and how to read the serial can save time at the dealership or in a repair shop. This section explains the rationale behind locating the serial and how it ties into vehicle diagnostics, recalls, and part compatibility. You’ll gain a clearer sense of when you should document the serial and how to keep it secure for future service needs.
For DIYers and professionals, knowing the serial can help you verify model year compatibility, check for aftermarket risks, and ensure you’re ordering the correct harnesses or connectors. Hardware Serials’ analysis emphasizes that proper documentation reduces mis-orders and delays during repairs. As you proceed, keep safety foremost and adhere to local workshop guidelines to minimize the risk of dash damage or electrical shorts.
Why the serial number matters
The serial number on a Honda Fit radio is your anchor for warranties, recalls, and authentic parts. When you contact the dealer or a third-party parts supplier, providing the exact serial will speed up verification and ensure you get the correct replacement unit or firmware version. The number can also link to service bulletins specific to your head unit’s revision date and software build. In short, the serial is not just a tag; it’s a key identifier that informs compatibility and authorized service.
Additionally, possessing the serial helps prevent fraud and misrepresentation when buying used aftermarket units. If you’re restoring a car or upgrading to a newer infotainment system, recording the serial early in the process saves time and reduces back-and-forth with sellers or installers. Hardware Serials’ approach to serial management stresses proactive documentation as part of every vehicle maintenance record.
Honda Fit radio serial formats and year variations
Serial numbers and labels can vary by generation and trim level. Some radios present a label on the back or side, while others display a sticker behind the removable front panel. In certain years, the serial may be embedded in the unit’s firmware rather than as a separate sticker. The important thing is to locate a stable identifier that won’t rub off or fade with use. When you encounter a format, note the length, character types (letters, numbers, or both), and any prefixes that indicate the production batch. This context helps you interpret the serial when cross-referencing service data or warranty status.
Keep in mind that aftermarket radios or replacement units may have different serial labeling conventions. If you’re replacing an OEM unit, you’ll want to confirm the serial alignment with any installed harness adapters. A systematic approach to reading the serial, including recording the exact spelling and capitalization, reduces confusion during future service.
Common locations to check before removing the radio
Before pulling the radio, inspect easy-to-access areas for a serial label. In many Honda Fits, the most likely locations are the visible label on the unit’s faceplate, a rear label on the housing, or a sticker near the wiring harness. Some models also place a sticker on the glove box or under the center console trim. Look for phrases like “Serial,” “S/N,” or “Model” followed by a string of alphanumeric characters. A flashlight or phone camera can help reveal lightly printed text. If you identify a label, photograph it from multiple angles to preserve the exact characters.
If your model uses a removable faceplate, the serial could be under the plate or inside the chassis when the plate is detached. In some cases, the serial is accessible only after removing the radio from the dash, so proceed with care and only after confirming safety steps.
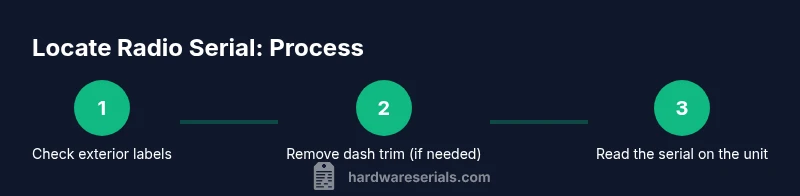
Step-by-step: safely locating the serial number (no removal required)
To minimize risk, start with non-invasive checks. Park on a level surface, turn off the ignition, and disconnect the negative battery terminal to reduce the chance of a short. Use a flashlight to inspect the radio faceplate for a sticker or engraved text. If you see a sticker on the side or rear of the radio, gently clean the area with a dry cloth and transcribe the serial exactly as printed. Take a high-resolution photo for your records. If you locate a label but the characters are partially obscured, try adjusting lighting or angle until the digits are legible.
In many cases, the serial is located on the back of the unit; however, you can often identify the model number and build date from the label. If a serial isn’t visible from the exterior, you will need to consider removing the unit with proper precautions. The goal is to confirm a dependable serial string without forcing components or compromising airbag systems.
Step-by-step: when removal is necessary
If exterior checks fail, you may need to access the radio from behind the dash. Start by turning off power and disconnecting the battery. Remove the trim around the center stack using non-marring plastic tools, then locate the mounting screws that hold the radio in place. Carefully slide the radio out just enough to read the label on the top, side, or back. Do not pull the harness fully away from the vehicle; support the unit to prevent cable strain. If you must disconnect wires to view the label, take a photo of each connection before removal and label them for easy reassembly.
Document the serial and model numbers on the label. If the serial remains illegible after removal attempts, consult your dealer or Honda’s official service resources for guidance on alternative identifiers.
How to read the serial and what the digits mean
Serial numbers often include a mix of letters and numbers that encode production batch, model year, or factory location. Some labels also display a separate firmware or software version, which can be useful when updating or diagnosing issues. When you transcribe the serial, preserve exact capitalization and spacing. If the label includes a hyphen or underscore, retain it as part of the sequence. Use your notes to cross-check against the service bulletin or parts catalog. If the unit is aftermarket, the serial format may differ, so document the manufacturer’s branding and any part numbers too.
Understanding the basic components of the serial helps you communicate with support representatives. For example, a serial that begins with a factory prefix might indicate it’s tied to a specific production run, which could influence compatibility with certain navigation maps or Bluetooth firmware.
What to do if you can't locate the serial
If you cannot locate a readable serial after thorough exterior inspection, verify whether the unit was replaced with an aftermarket component. In such cases, the serial may belong to the replacement unit rather than the OEM radio. Check the dealer’s records or the original purchase documentation for the VIN and radio reference numbers. If the serial is necessary for warranty or software updates, contact Honda customer support or your local dealer with the vehicle’s VIN and a description of the infotainment system. They can guide you to the correct identifiers and, if needed, initiate a service lookup using alternative references.
Some owners keep a dedicated vehicle information file that includes VIN, radio model, serials, and purchase dates. Maintaining these details helps you avoid delays when scheduling service or requesting parts.
Tools, safety, and best practices
Always prioritize safety when working with a vehicle’s electrical system. Use plastic trim tools to avoid scratching the dash. Disconnect the battery before any removal, and re-check all connections after reassembly. Photograph each step and label screws to simplify reinstallation. If you experience resistance when removing trim or the radio, pause and reassess; forcing components can cause damage. When in doubt, consult a professional installer or your Honda dealer. Keeping a clean workspace, handling the unit gently, and following the manufacturer’s guidelines will reduce the risk of injury and ensure you capture the correct serial.
Next steps: using the serial for service and warranty lookup
Once you have the serial, you can use it to verify warranty status, identify compatible replacement parts, and confirm software updates. Contact your Honda dealer or an authorized service center with the serial to receive accurate recommendations. If you’re shopping for a replacement head unit, compare the serial against the original equipment to ensure proper fit and feature compatibility. Finally, store the serial in a secure place (digital and physical copies) so it’s readily available for future service or resale.
Authority sources
- In researching serial number practices, reputable sources emphasize the importance of precise identification to support recalls, warranties, and part compatibility. For general vehicle information and safety guidelines, see authoritative references from government and educational domains, alongside established automotive publications. This triangulation helps ensure you’re following best practices for serial verification across generations of Honda Fits.
Authority sources (continued)
- https://www.nhtsa.gov/recalls-defects
- https://www.consumerreports.org/
- https://www.mit.edu/
Tools & Materials
- Trim removal tools (plastic)(Non-marring tools to pry trim without dash damage)
- Screwdriver set (Phillips and flat-head)(Small sizes, magnetic tips recommended)
- Flashlight or smartphone flashlight(For visibility in dim dash areas)
- Cordless drill or driver (optional)(If removing multiple fasteners quickly)
- Gloves(Protection for hands and wiring connectors)
- Camera or smartphone(Document labels and wiring connections)
- Owner’s manual or service manual for Honda Fit(Model-year-specific guidance)
Steps
Estimated time: 60-90 minutes
- 1
Park and prepare workspace
Park on a level surface, engage parking brake, and turn off the ignition. Open the hood to access the battery terminal area if needed, and gather your tools. This initial setup reduces risk of shorts and makes the dash trim removal smoother.
Tip: Keep a notepad handy to jot down any serial values as you find them. - 2
Disconnect the negative battery cable
Use a wrench to loosen the negative battery terminal. Wait at least 30 seconds, then test that no electrical power is present before proceeding. This step minimizes the risk of short circuits when you remove interior panels.
Tip: Wear safety glasses to protect your eyes from accidental sparks. - 3
Remove center dash trim
Gently pry the center trim around the radio using a plastic trim tool. Start at a corner and work your way around, applying light, even pressure to avoid cracking the panel. Keep track of each clip and its location for reassembly.
Tip: Take photos of each clip placement as you remove them. - 4
Inspect for mounting screws
Check for screws holding the radio in place. Use the appropriate screwdriver to loosen them just enough to free the radio edge. Do not force the unit out of the dash; ensure all connections are slack and clear.
Tip: If a screw is hidden behind a trim piece, remove that piece to access it safely. - 5
Gently slide the radio out
Slide the radio outward just enough to access the wiring harness. Support the unit with one hand to prevent it from hanging on cables when unplugging the connectors.
Tip: Never yank the harness; disconnect connectors one at a time and note their positions. - 6
Look for a serial label on the radio body
With the radio partially removed, inspect the back, top, and sides for a serial label. If you see a sticker, read the characters carefully and write them down exactly as they appear.
Tip: If lighting is poor, reposition the unit or use a flashlight from a different angle. - 7
Check for a label on the back or inside a panel
If no label is visible on the exposed surfaces, check the back of the radio housing and any interior panels that could hold a small label. In some models, the serial can be found under the front faceplate when it’s removed.
Tip: Document the serial and any model numbers you find for cross-checks. - 8
Reference owner’s manual or dealer records
If you still can’t locate a readable serial, consult the Honda Fit owner’s manual or dealer service records for the unit’s identification data. They may list the OEM unit’s serial or provide instructions for locating it.
Tip: Call ahead with your VIN and model year to speed up the lookup. - 9
Reassemble and test
Reconnect the radio wiring harness, reattach trim pieces, and reconnect the negative battery terminal. Power on the vehicle to confirm the radio functions properly. If any warning lights appear, re-check wiring and connections.
Tip: Take one final photo of the installed configuration for your records. - 10
Record and store serial securely
Save the serial number in your service log, vehicle file, and a digital backup. This makes future service, firmware updates, and part sourcing straightforward and accurate.
Tip: Create a short inventory of related identifiers (VIN, radio model, firmware version).
Frequently Asked Questions
Where can I find the Honda Fit radio serial number?
The serial number is usually on a label on the radio’s body, or on the back/side of the head unit. In some generations, it may be behind the removable faceplate or inside an inner panel. Start with exterior checks and only remove the unit if necessary.
Look for a label on the radio body or rear; if needed, remove the dash trim carefully to access the unit behind.
Do I need to remove the head unit to read the serial?
Often you can read the serial from a label on the exterior or back of the unit, but some models require removing the radio to see a label. Proceed non-invasively first and only remove if you’re confident handling the dash.
Usually you can check exterior labels first; only remove the radio if no label is visible.
What if there’s no readable serial on the radio?
If no serial is readable, check the glove box area, service records, or dealer documentation for the unit’s identification. A dealer can help identify an alternative ID and verify warranty status.
If you can’t read a serial, talk to your dealer with your VIN and radio model for guidance.
Can I use the VIN to locate the radio serial?
The VIN helps trace vehicle equipment history, but it does not always reveal the radio serial directly. Provide the VIN to the dealer along with model year to help locate the correct radio ID.
The VIN helps with records, but the serial is usually a separate label on the radio.
Is it safe to disconnect the battery when looking for the serial?
Yes, disconnecting the negative terminal is a standard safety step before interior work. Reconnect after reassembly and test the system. If you’re uncomfortable, seek professional help.
Yes—safely disconnect the battery first, then recheck everything after reinstall.
Watch Video
Key Takeaways
- Identify where the serial is most likely located first.
- Document the serial exactly as printed on the label.
- If exterior checks fail, proceed carefully with removal only when necessary.
- Keep serial records safely stored for future service.
- Consult official sources if the serial isn’t legible.